 Contact groups allow you to organize groups of emails addresses and domains in your own structure. Once created, you can use the “Contact Group” filter in your dashboard to quickly focus on conversations with the emails addresses and domains that belong to those groups.
It’s up to you how to organize your contacts in groups. For example, you can group contacts by:
Contact groups allow you to organize groups of emails addresses and domains in your own structure. Once created, you can use the “Contact Group” filter in your dashboard to quickly focus on conversations with the emails addresses and domains that belong to those groups.
It’s up to you how to organize your contacts in groups. For example, you can group contacts by:
- Importance (Tier 1, Tier 2, Tier 3)
- Location (EMEA, North America, Asia…)
- Your relationship with them (Clients, prospects, partners…)
Basics
On Settings > Contact Groups, you’ll find a list of your current contact groups. If you still don’t have any contact groups you will be prompted to create one.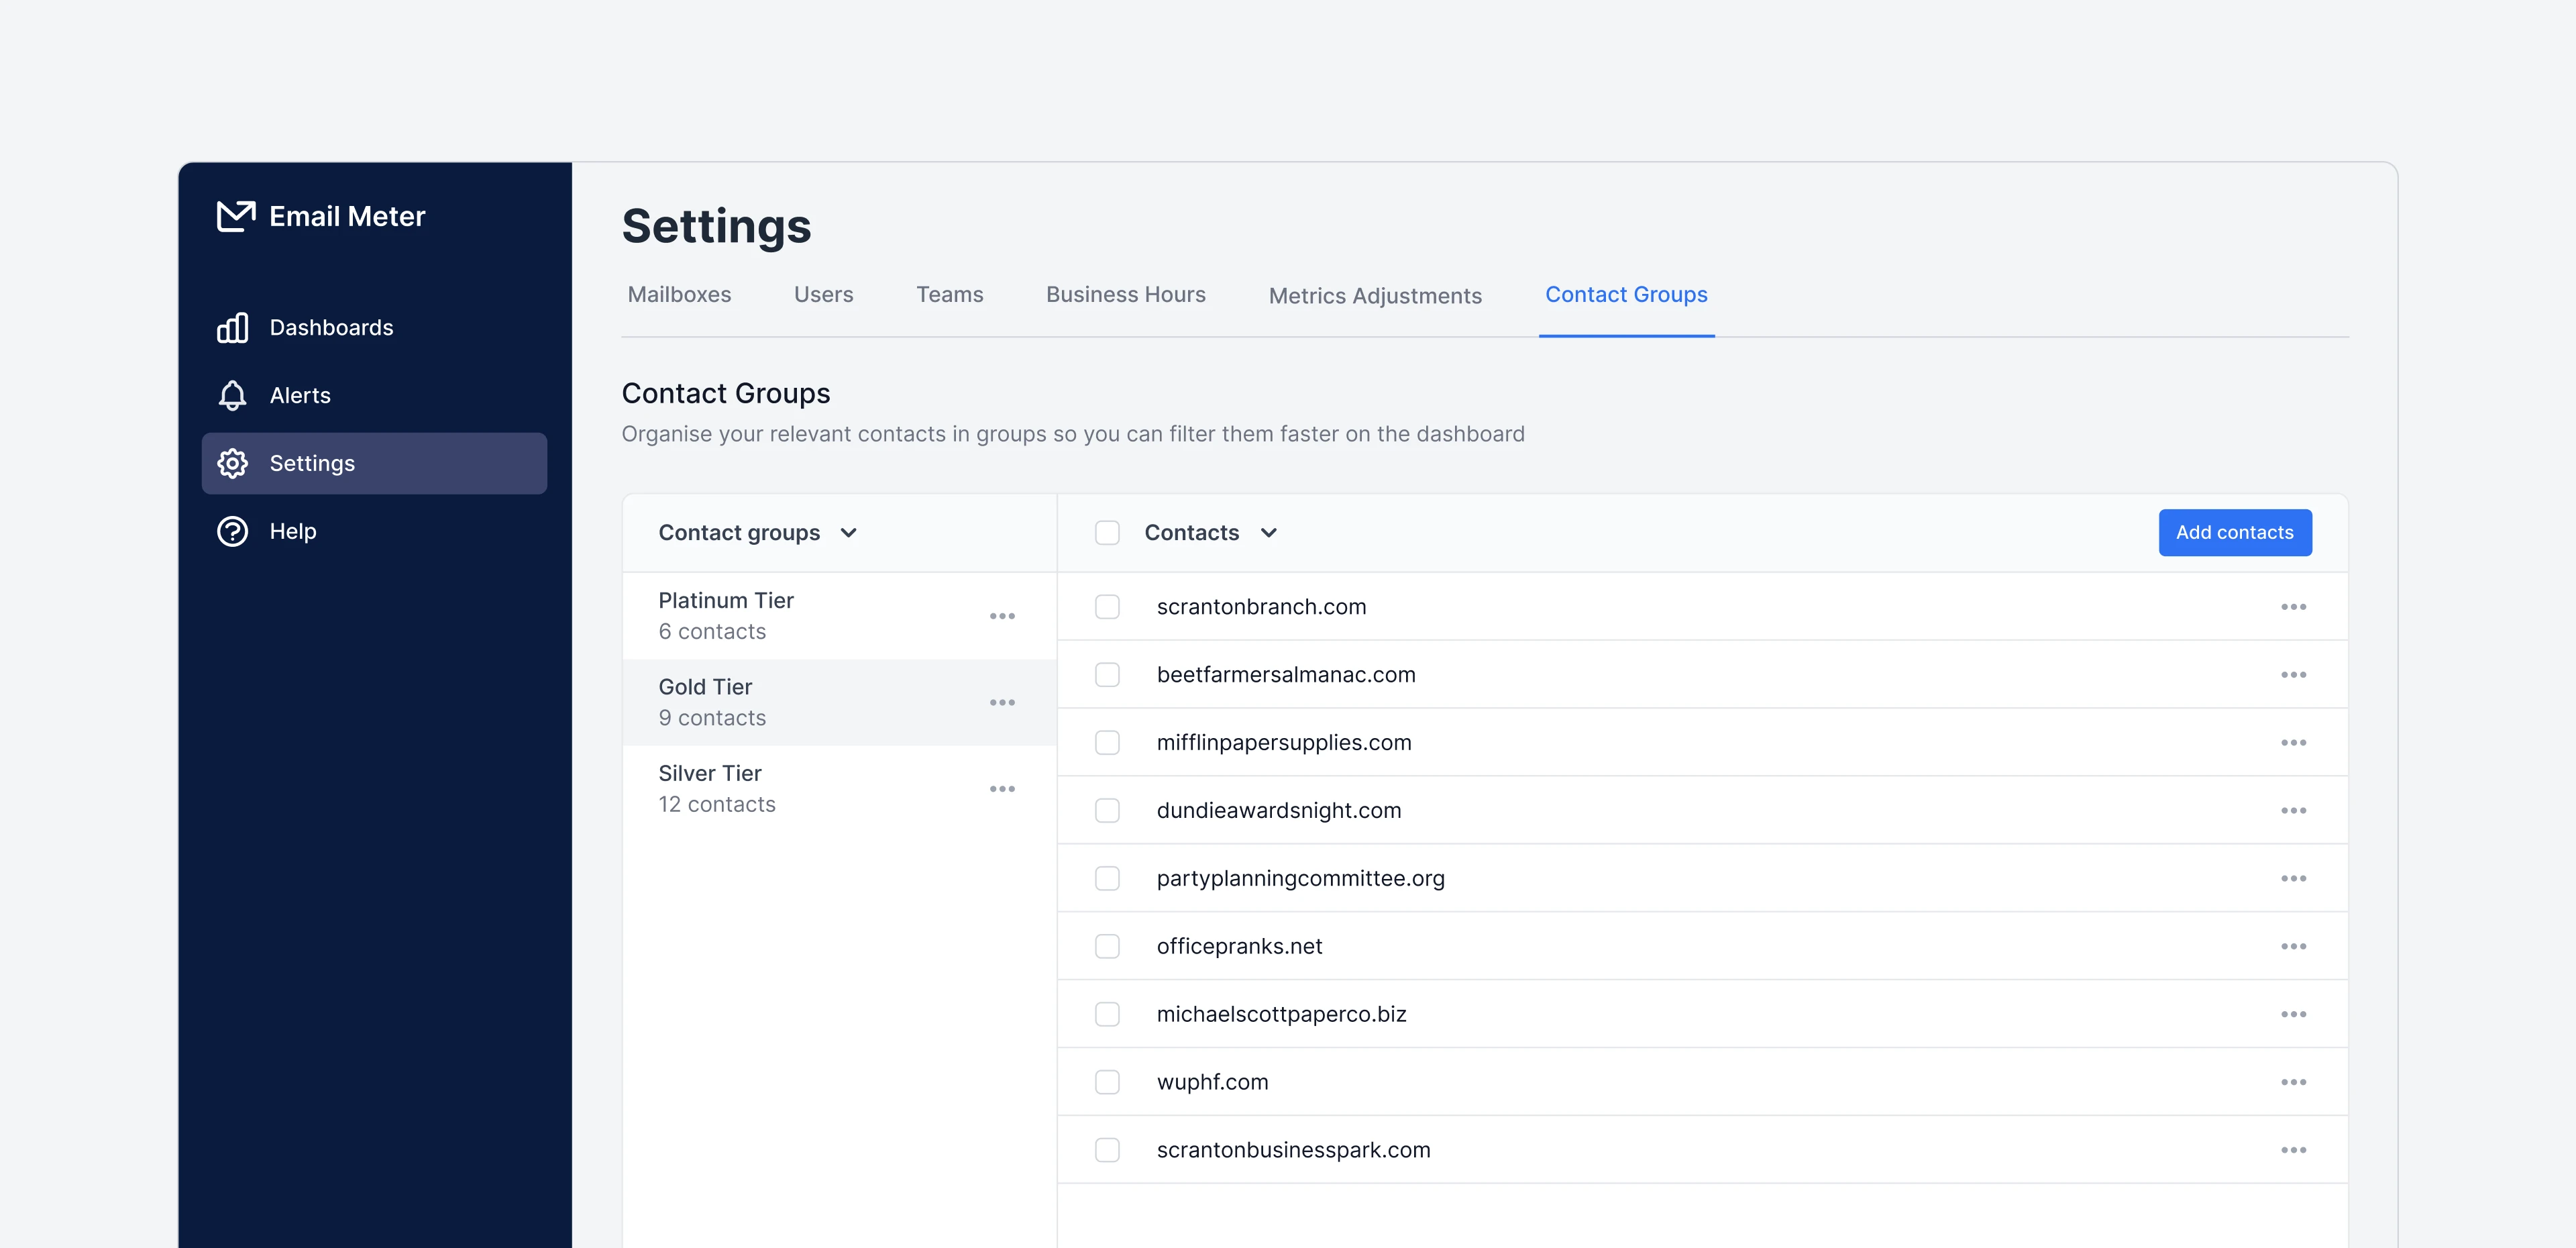
Create contact groups
Go to Settings > Contact Groups to create new contact groups. You can create new contact groups by clicking the+ New group button.
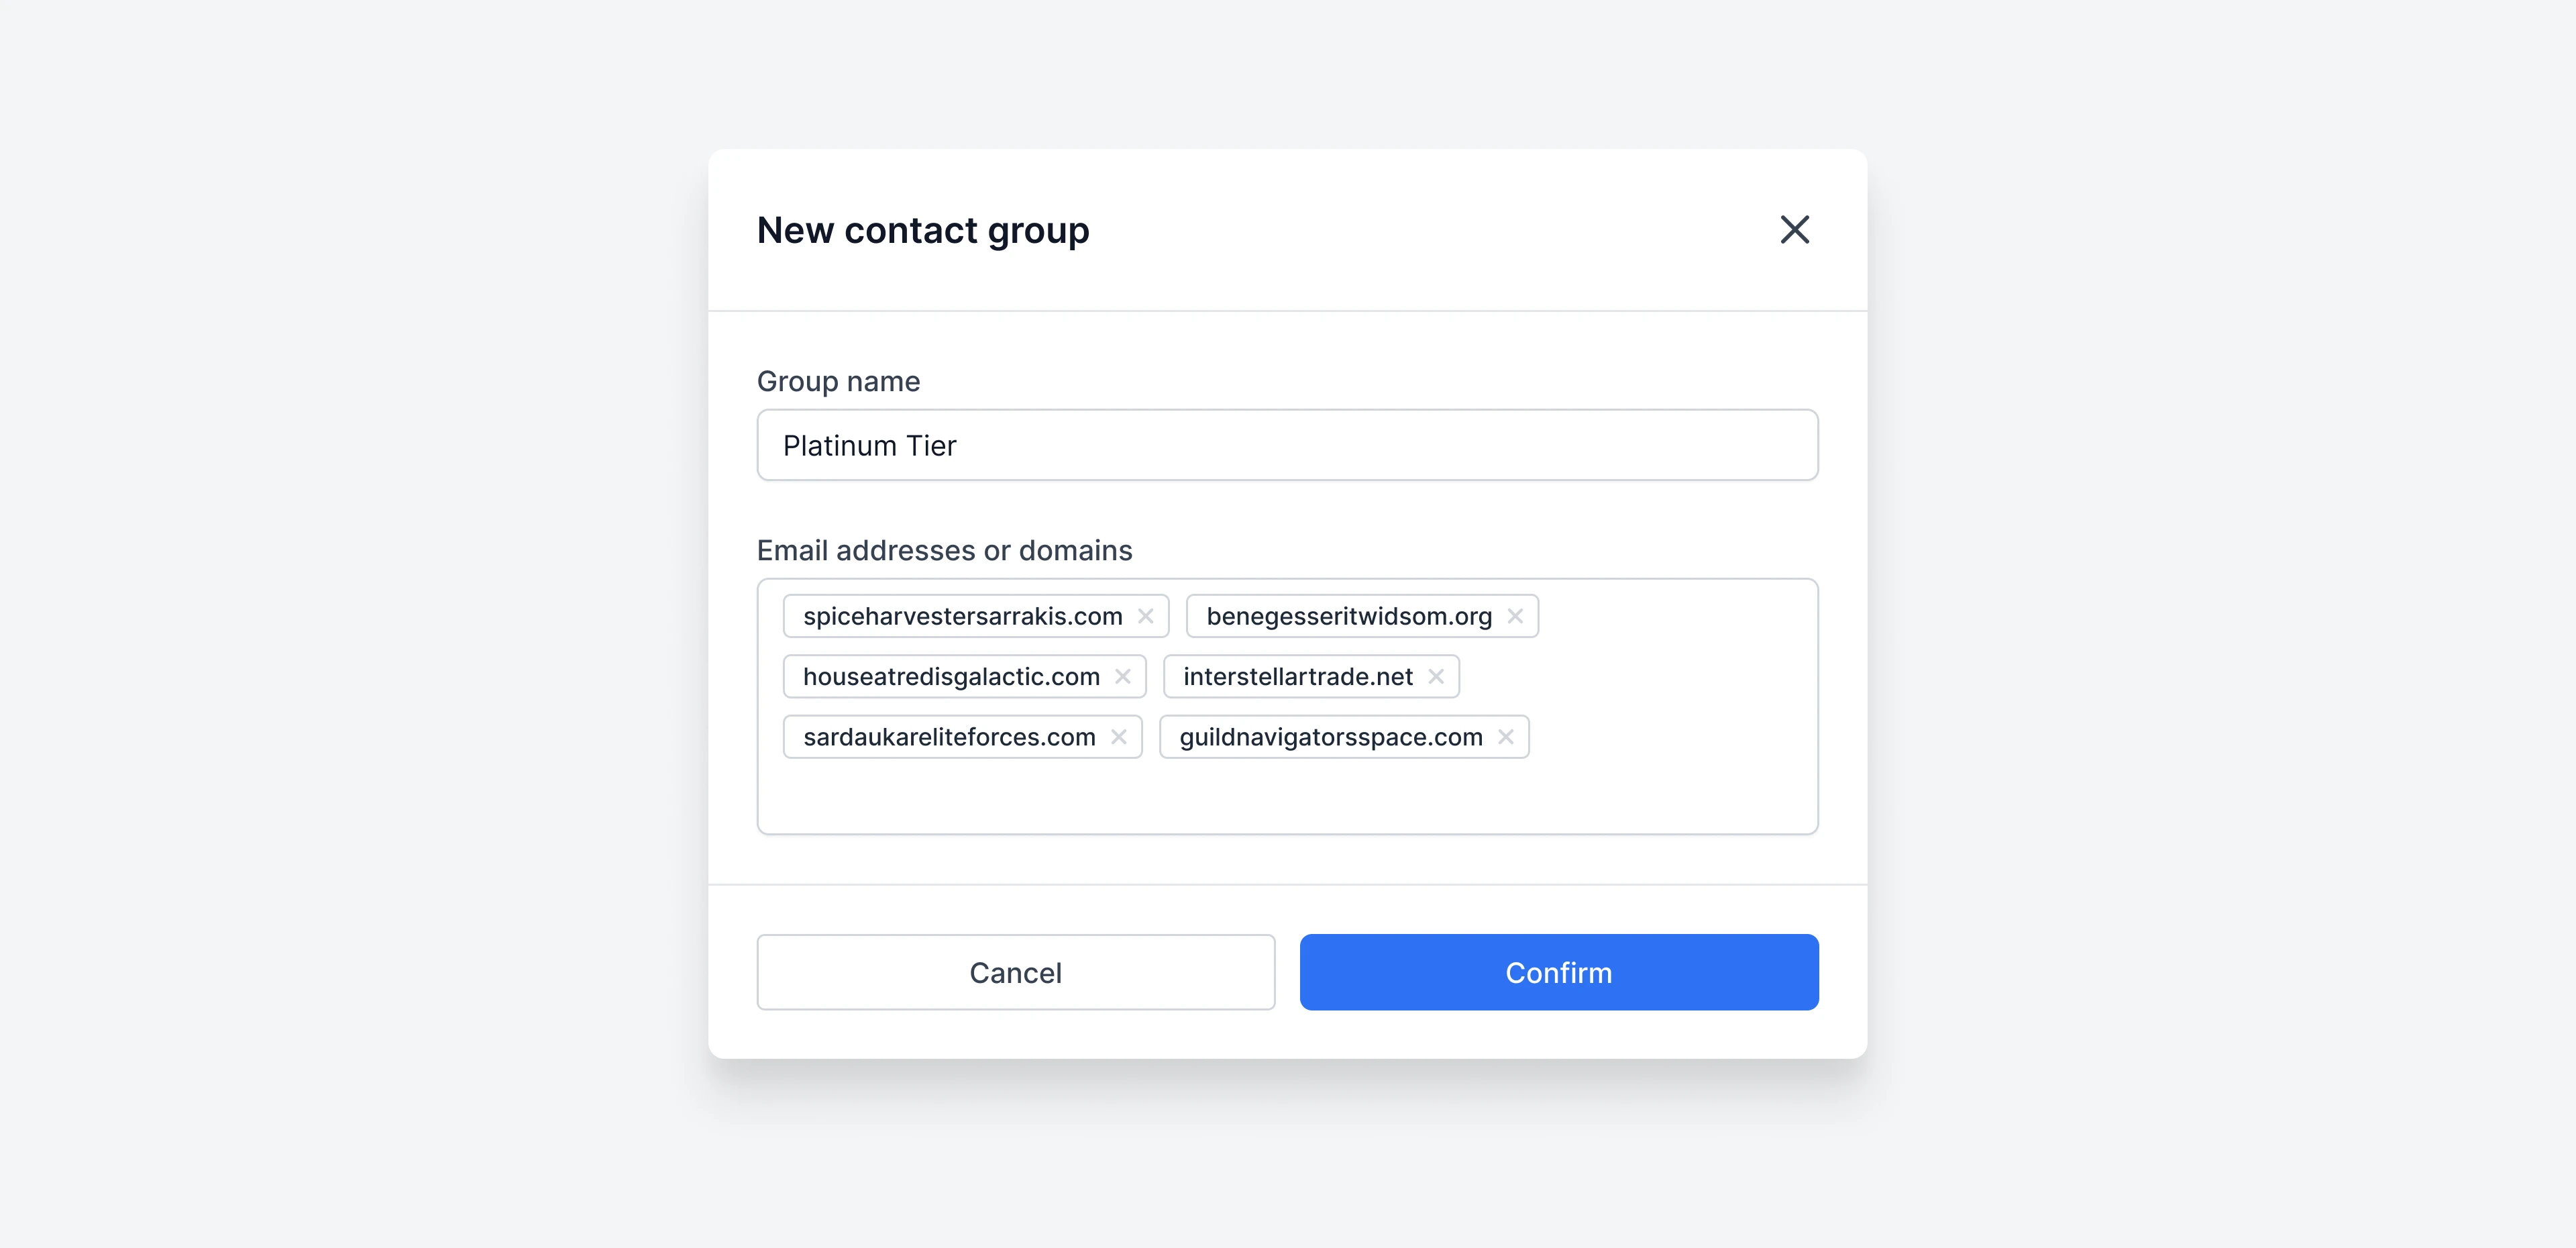 Just type the name of the group and add the email addresses and domains that you want to include.
Add and remove contacts from a group
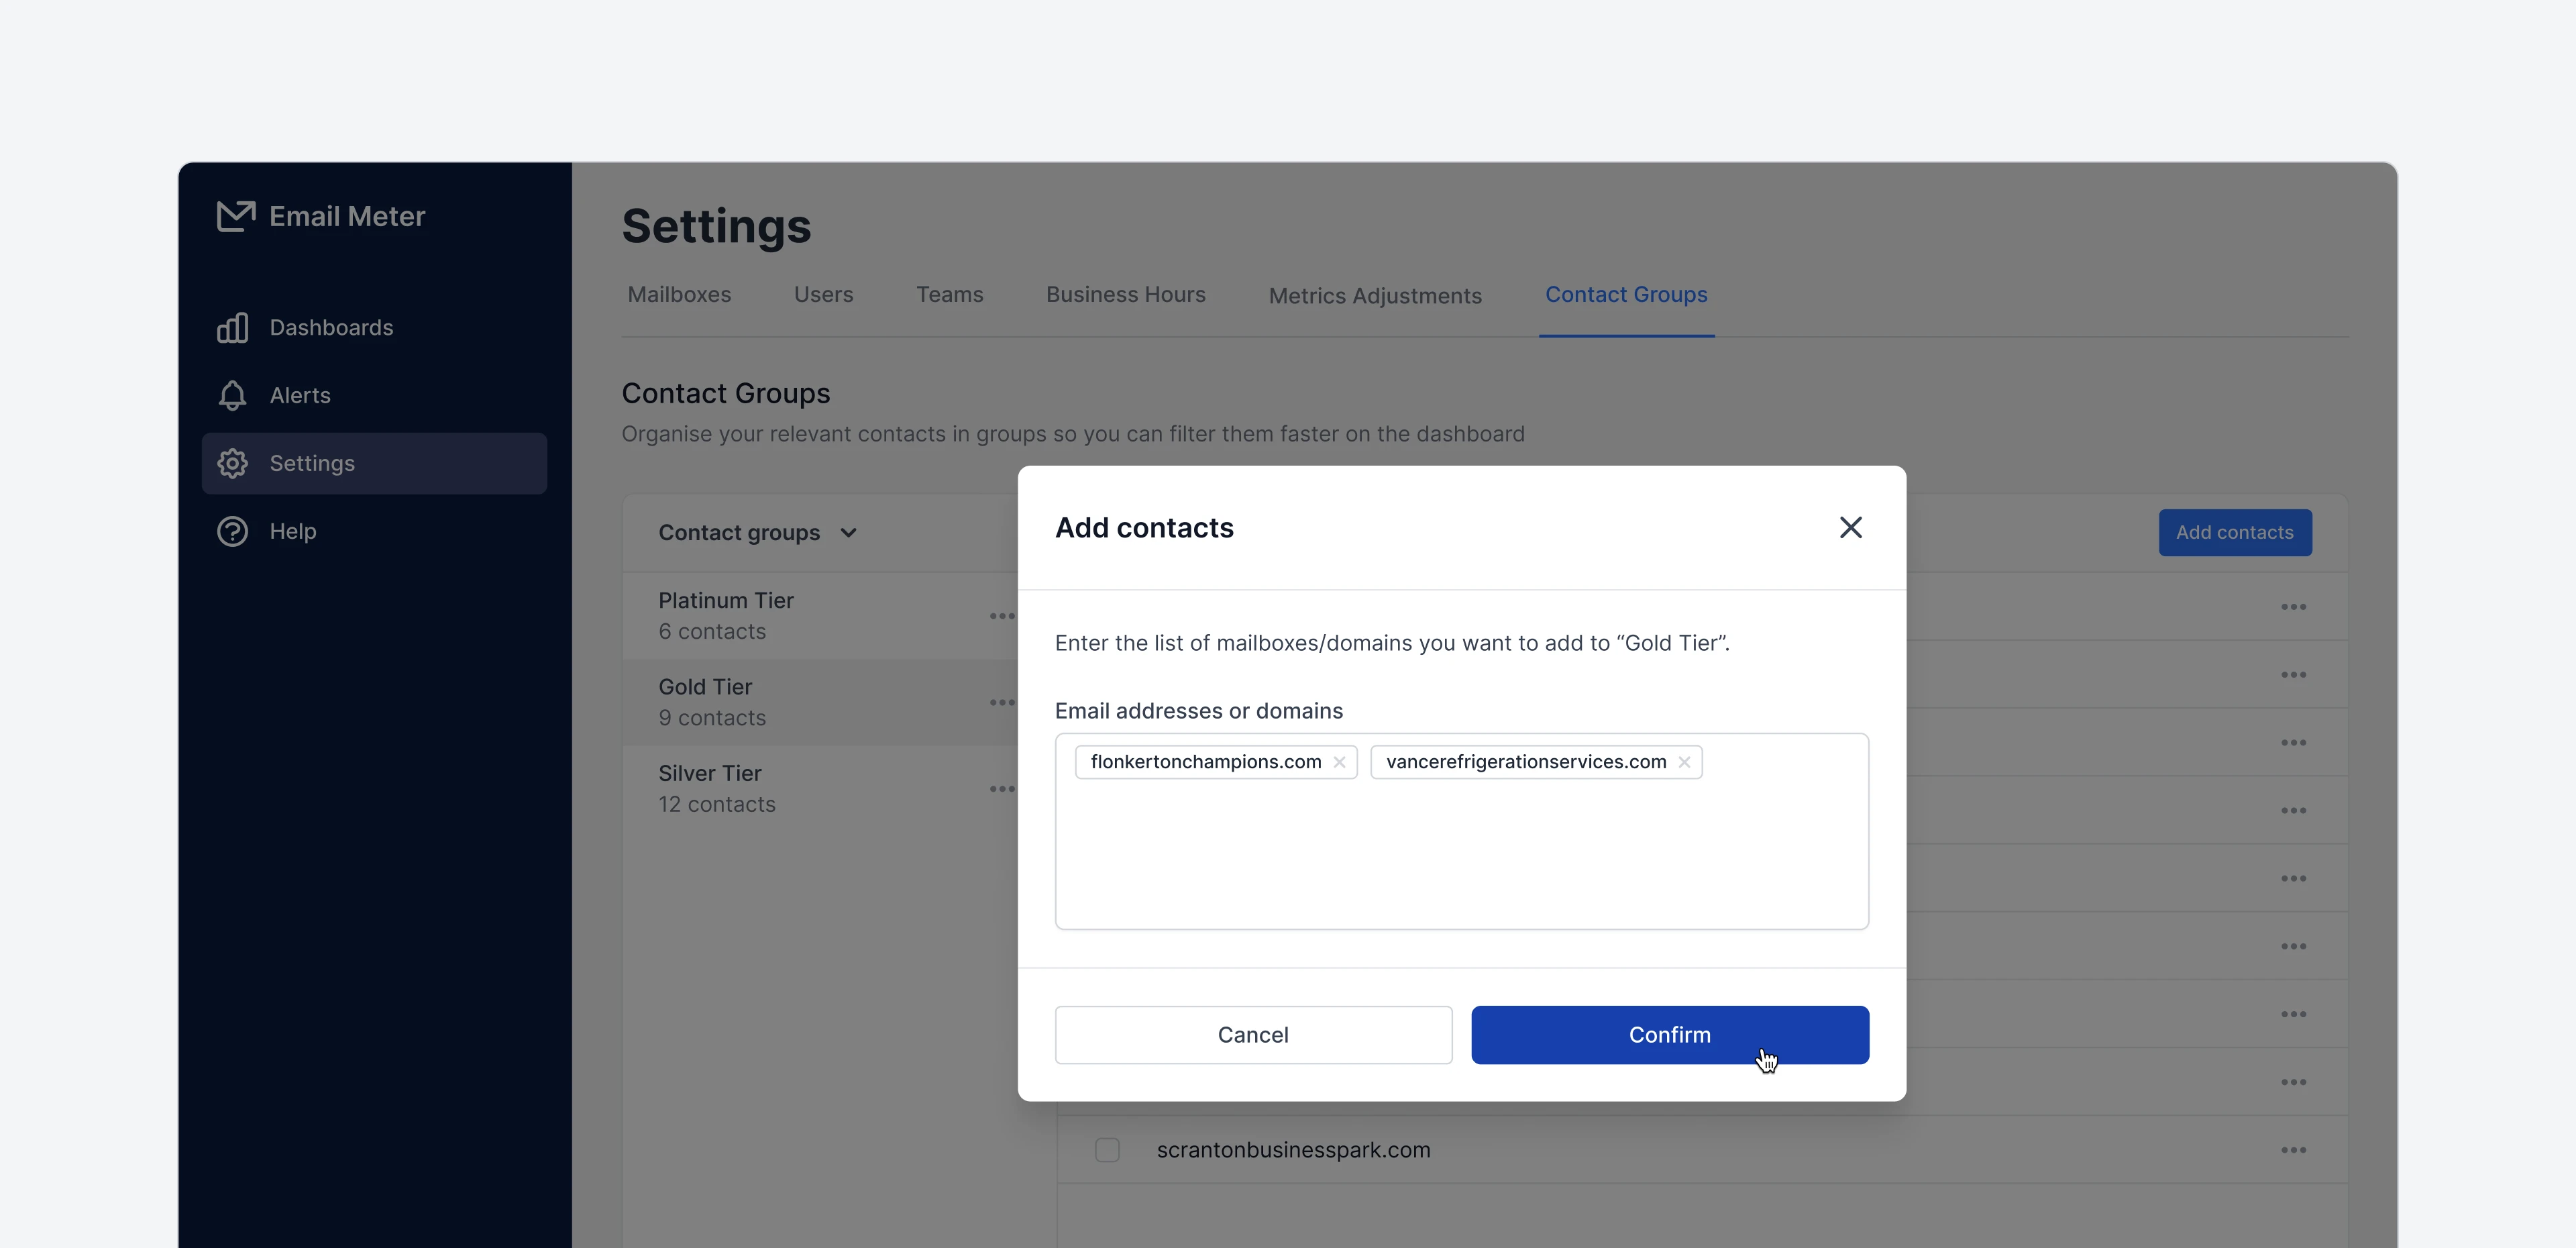
Go to Settings > Contact Groups and select the group that you want to add or remove contacts from. To add contacts, just click on theAdd contacts button and input the email addresses or domains you want to add.
 To remove contacts, just click the
 ··· icon next to any contact to remove it. You can also use the checkboxes to select multiple contacts and remove them in bulk.
Remove a contact group
To remove a contact group, just click the··· icon next to the contact group. Then, click on Remove group. A modal will open to confirm the action.

Filtering by contact group on your dashboard
Once contact groups are created, focusing on your statistics when communicating with specific contact groups is simple. On the filter bar of your dashboard, you’ll find aContact groups filter. Here, you can select the contact groups you want to focus on.
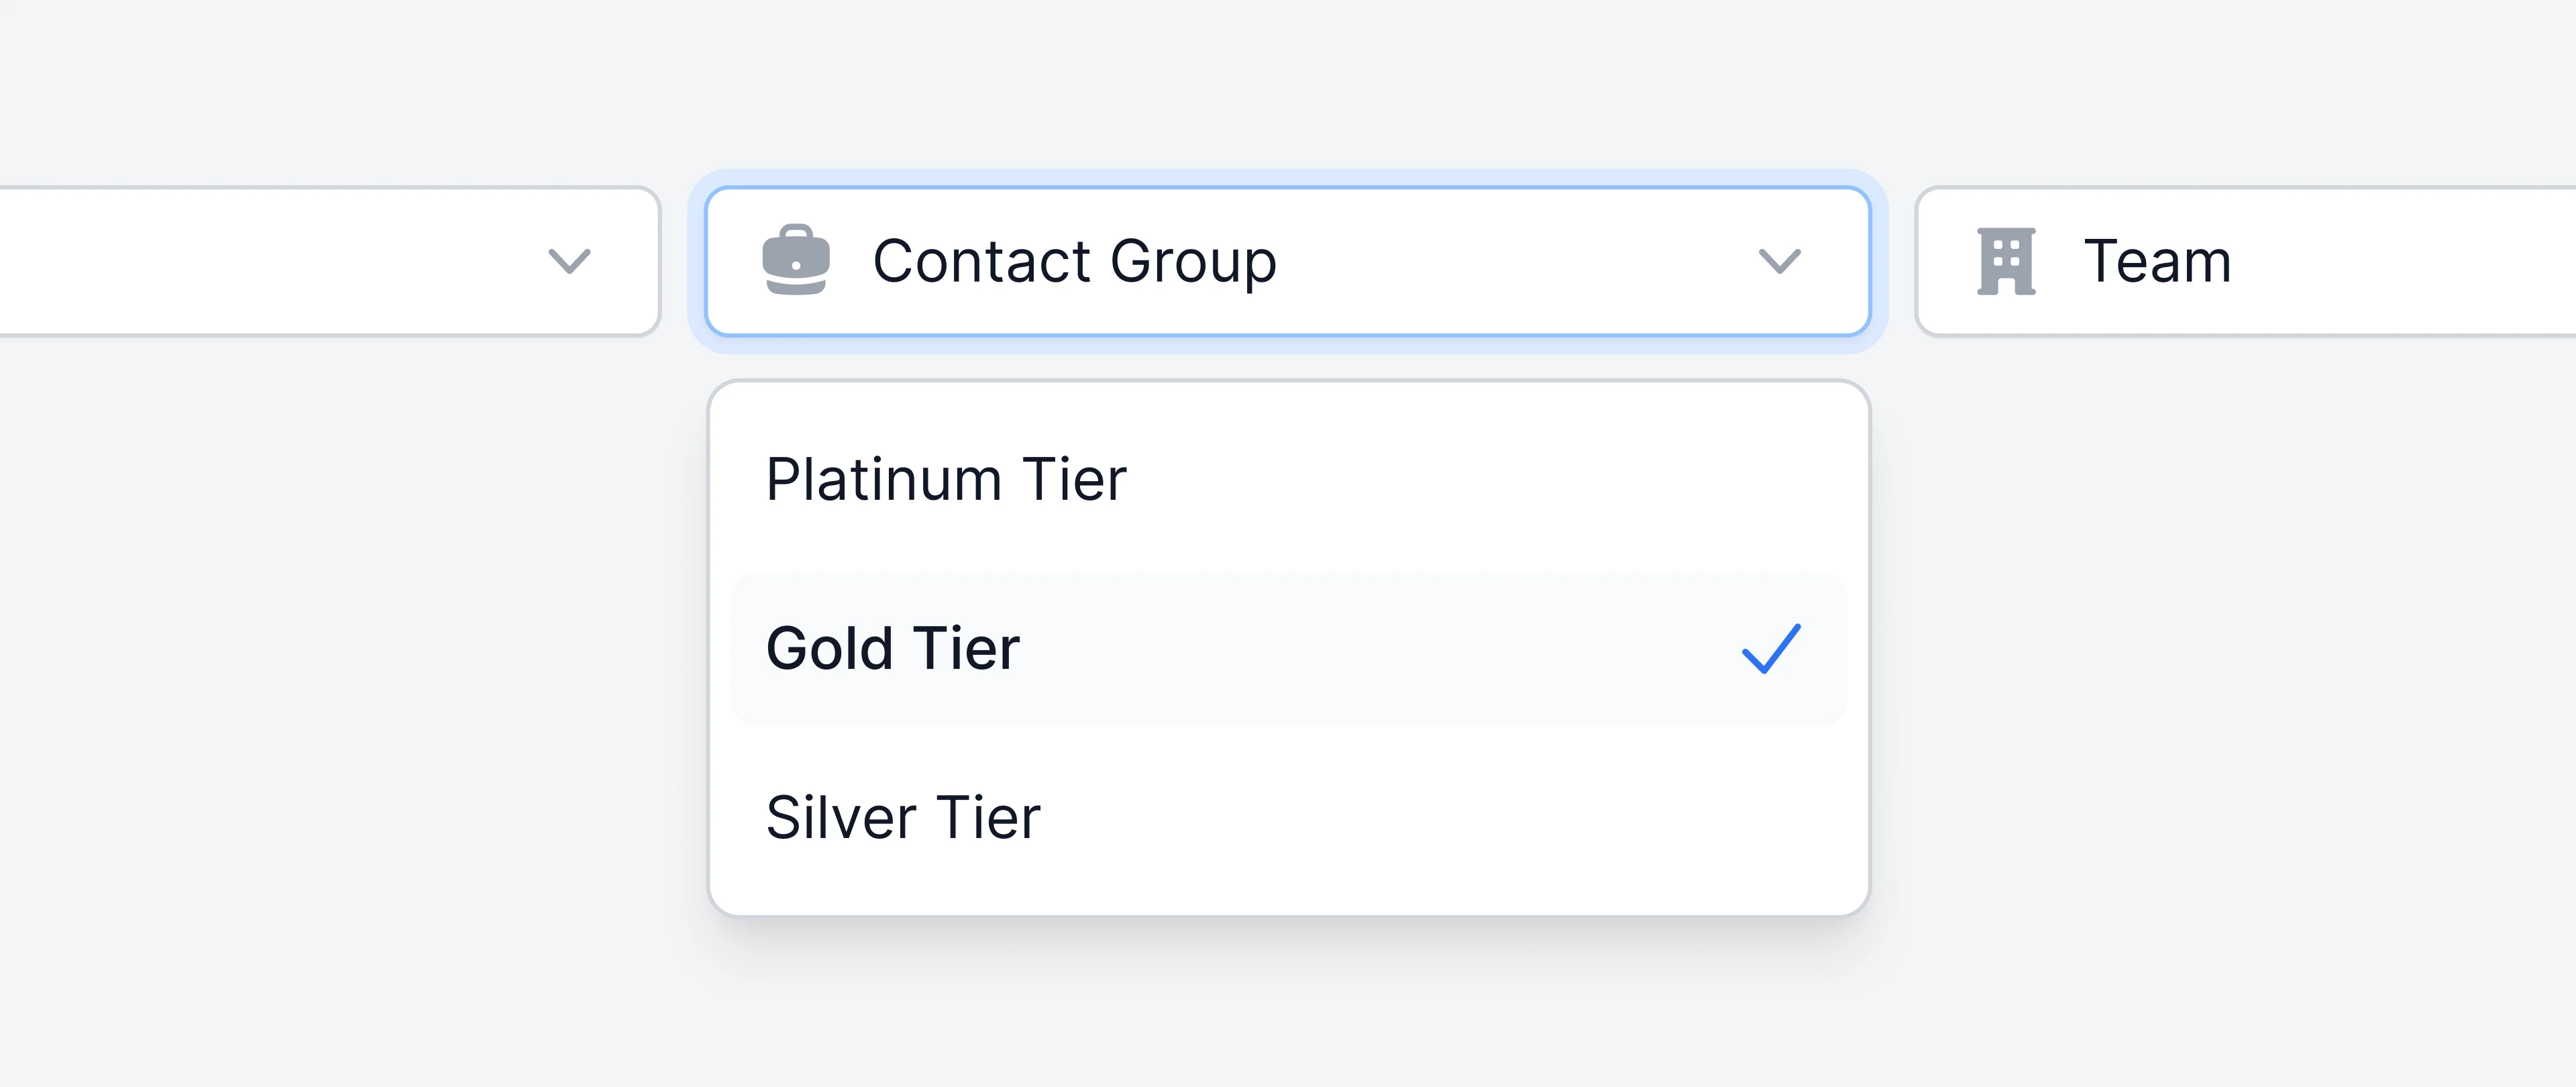 Once selected, your dashboard will reflect the metrics corresponding to your communication with the email addresses and domains that belong to the contact group you selected.
Frequently asked questions
Can I import contacts groups in bulk?
Can I import contacts groups in bulk?
Not at this point, but we are working on a feature that will allow you to import contact groups using a CSV file.
Can I sync contact groups with a CRM (Hubspot, Salesforce)?
Can I sync contact groups with a CRM (Hubspot, Salesforce)?
At the moment it’s not possible to automatically sync contacts from your CRM into Email Meter, but it’s something on our radar. If you are interested in this, please share your specific use case with your Account Manager.
Is there a limit to how many contact groups I can create?
Is there a limit to how many contact groups I can create?
At the moment there is no specific limit on the number of teams that you can create. There is also no limit on the number of contacts that you can add to a specific contact group.
I’ve created a contact group but I still don’t see it on my dashboard
I’ve created a contact group but I still don’t see it on my dashboard
Changes made to contact groups are reflected on your dashboard the following day at 12:01AM local time.