 You can manually invite, remove, and change the role of users from the Settings > Users page. User roles are granular so you have full control of the level of access each user has.
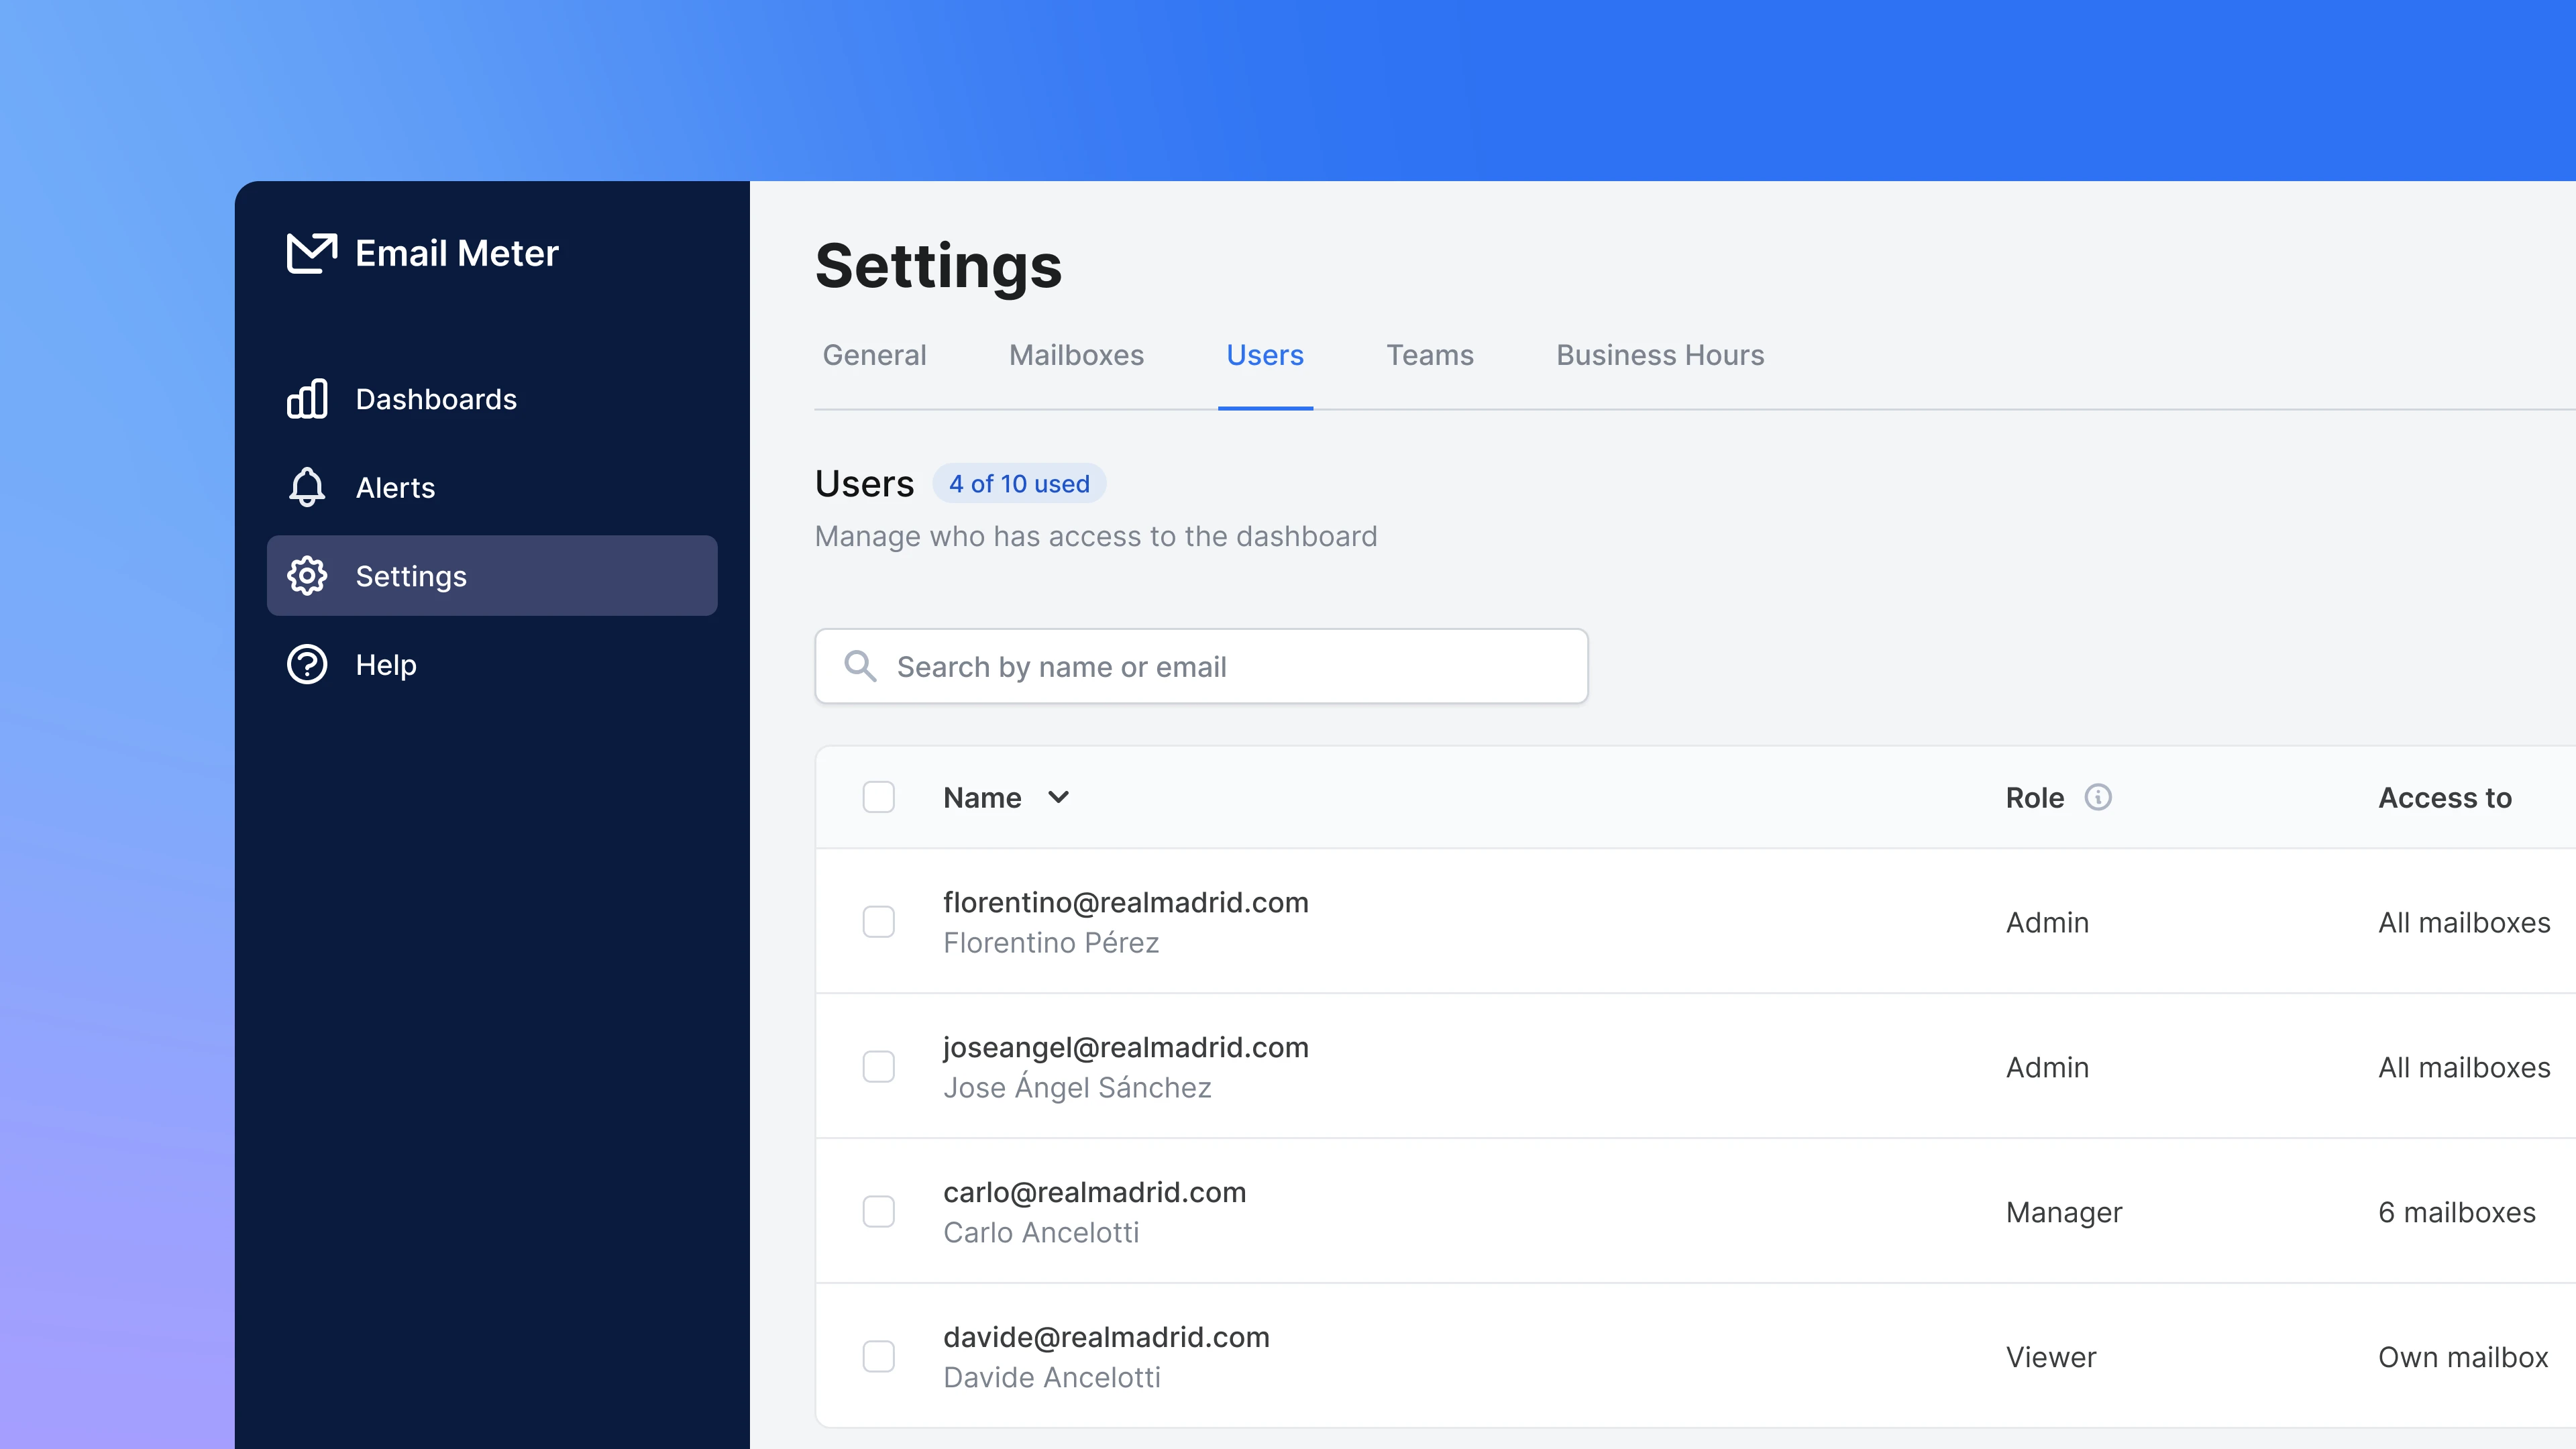
You can manage who can access Email Meter from the Settings > Users page.
You can manually invite, remove, and change the role of users from the Settings > Users page. User roles are granular so you have full control of the level of access each user has.
You can manage who can access Email Meter from the Settings > Users page.
Users should not be confused with mailboxes. A user can have access to Email Meter to see email statistics without having their mailbox tracked, and a mailbox can be tracked without that person having access to Email Meter to see statistics.
Basics
On Settings > Users, you’ll find a list of your current users.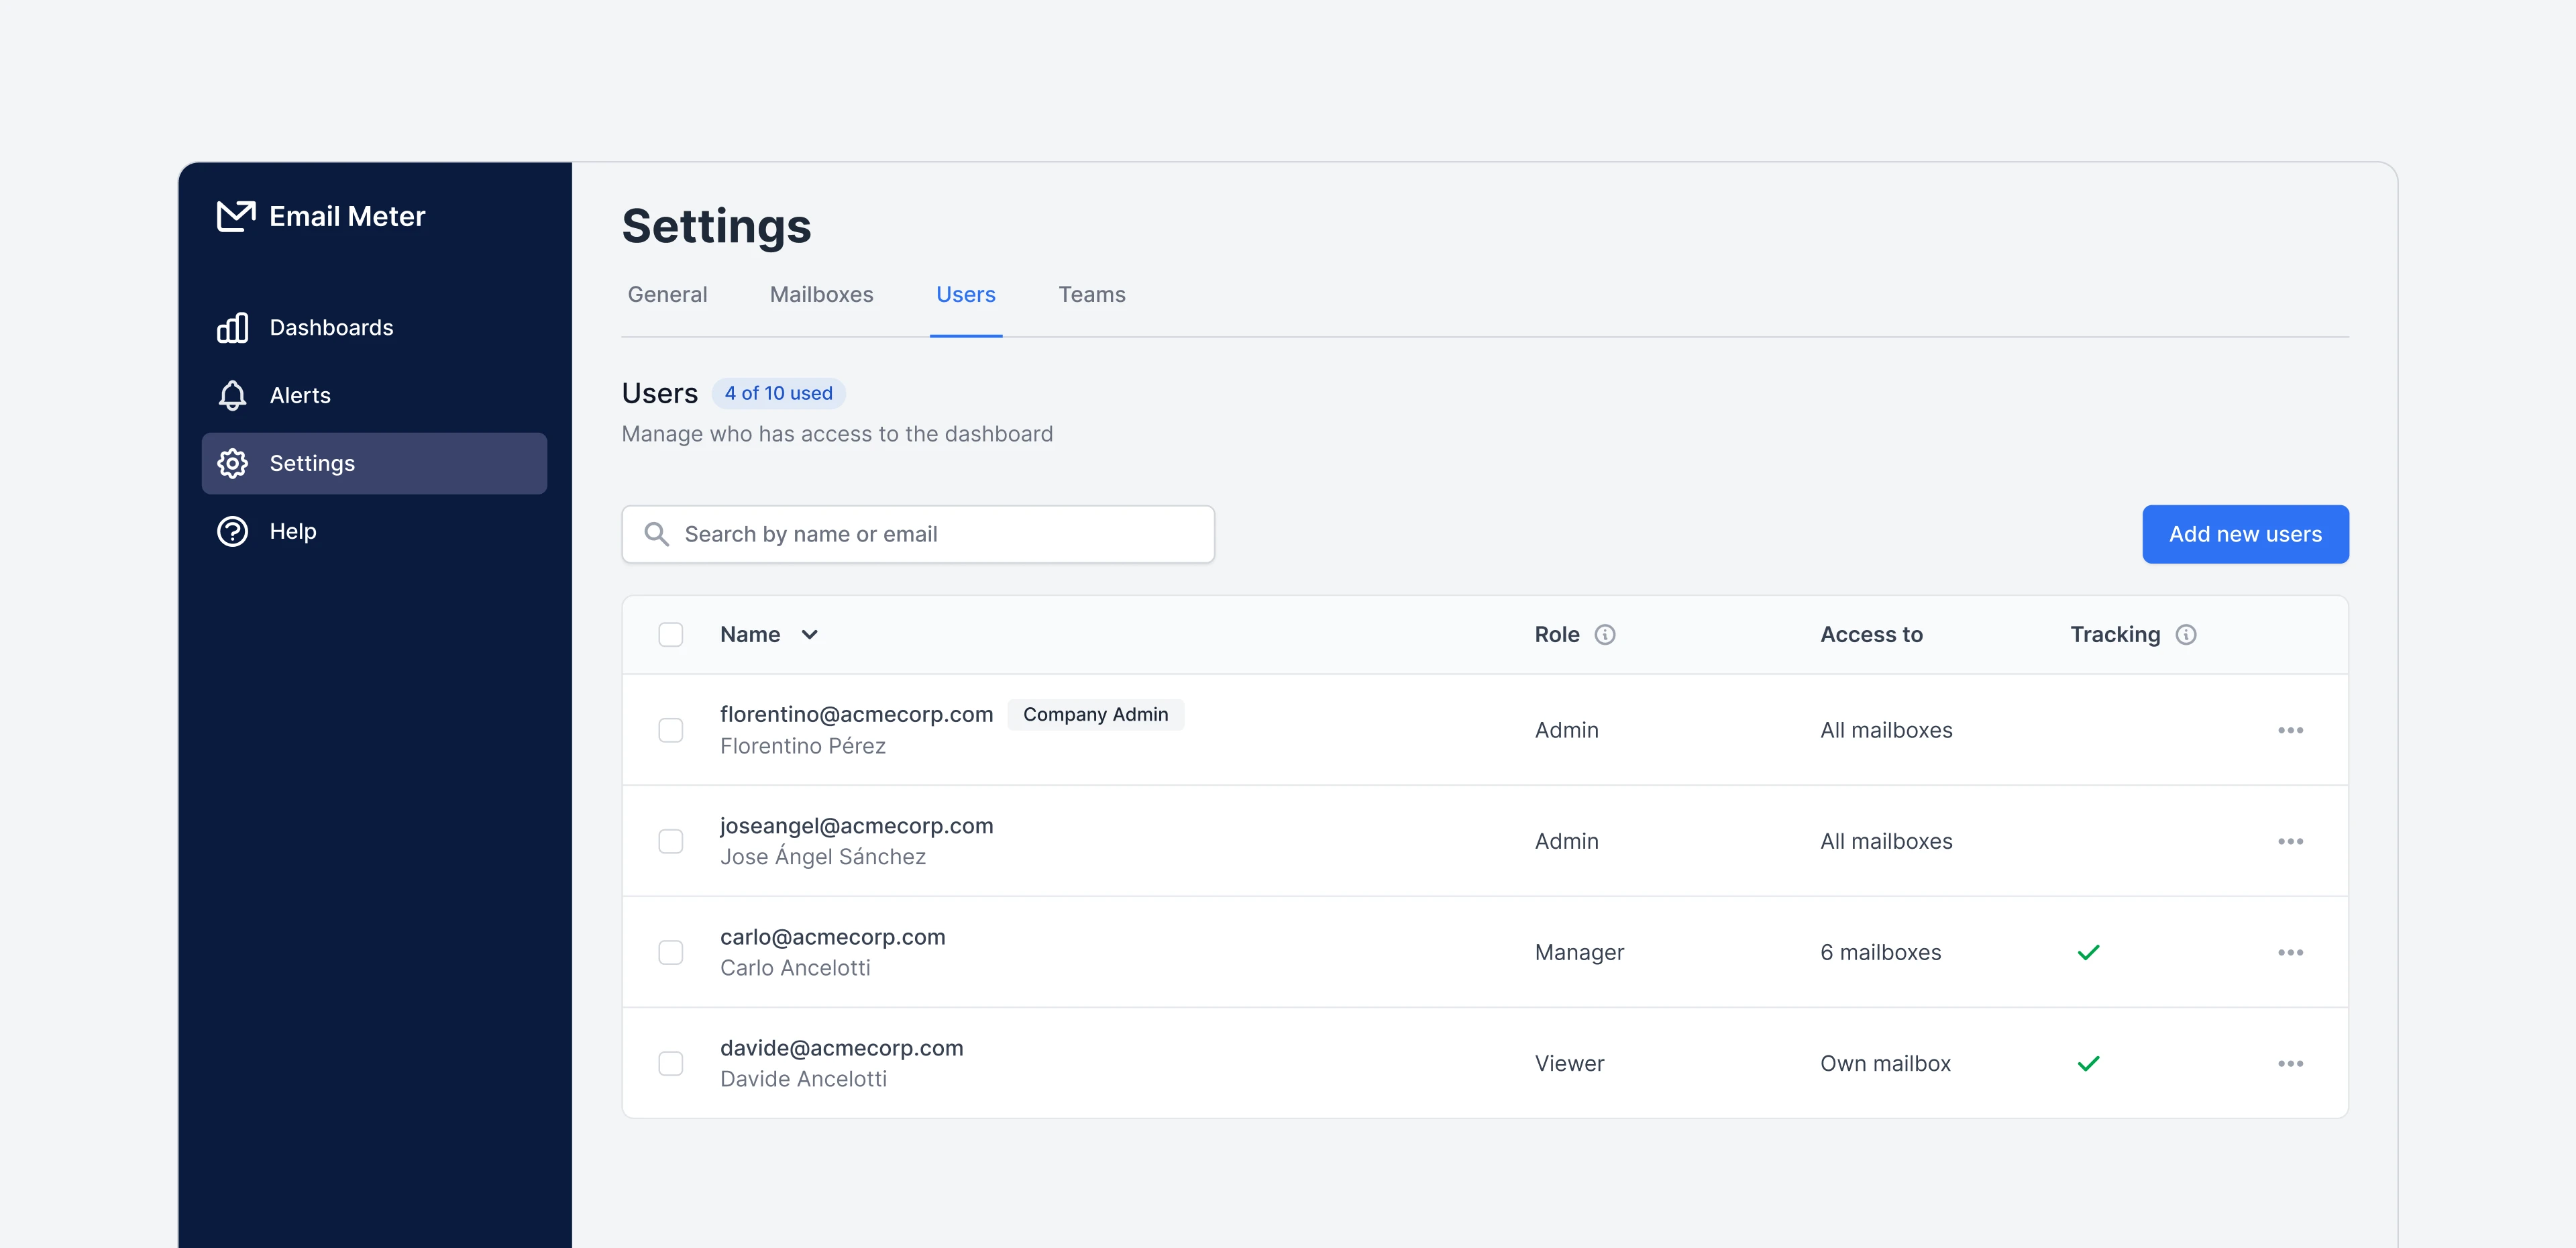 They are displayed in a table with the following fields:
| Field | Description |
|---|---|
| Name | The email address of the user. |
| Role | The current role of the user. |
| Access to | A short explanation of the level of access the user has, including the Teams and/or individual mailboxes they can access. |
| Tracking | This field displays if this email address is also being tracked by Email Meter. |
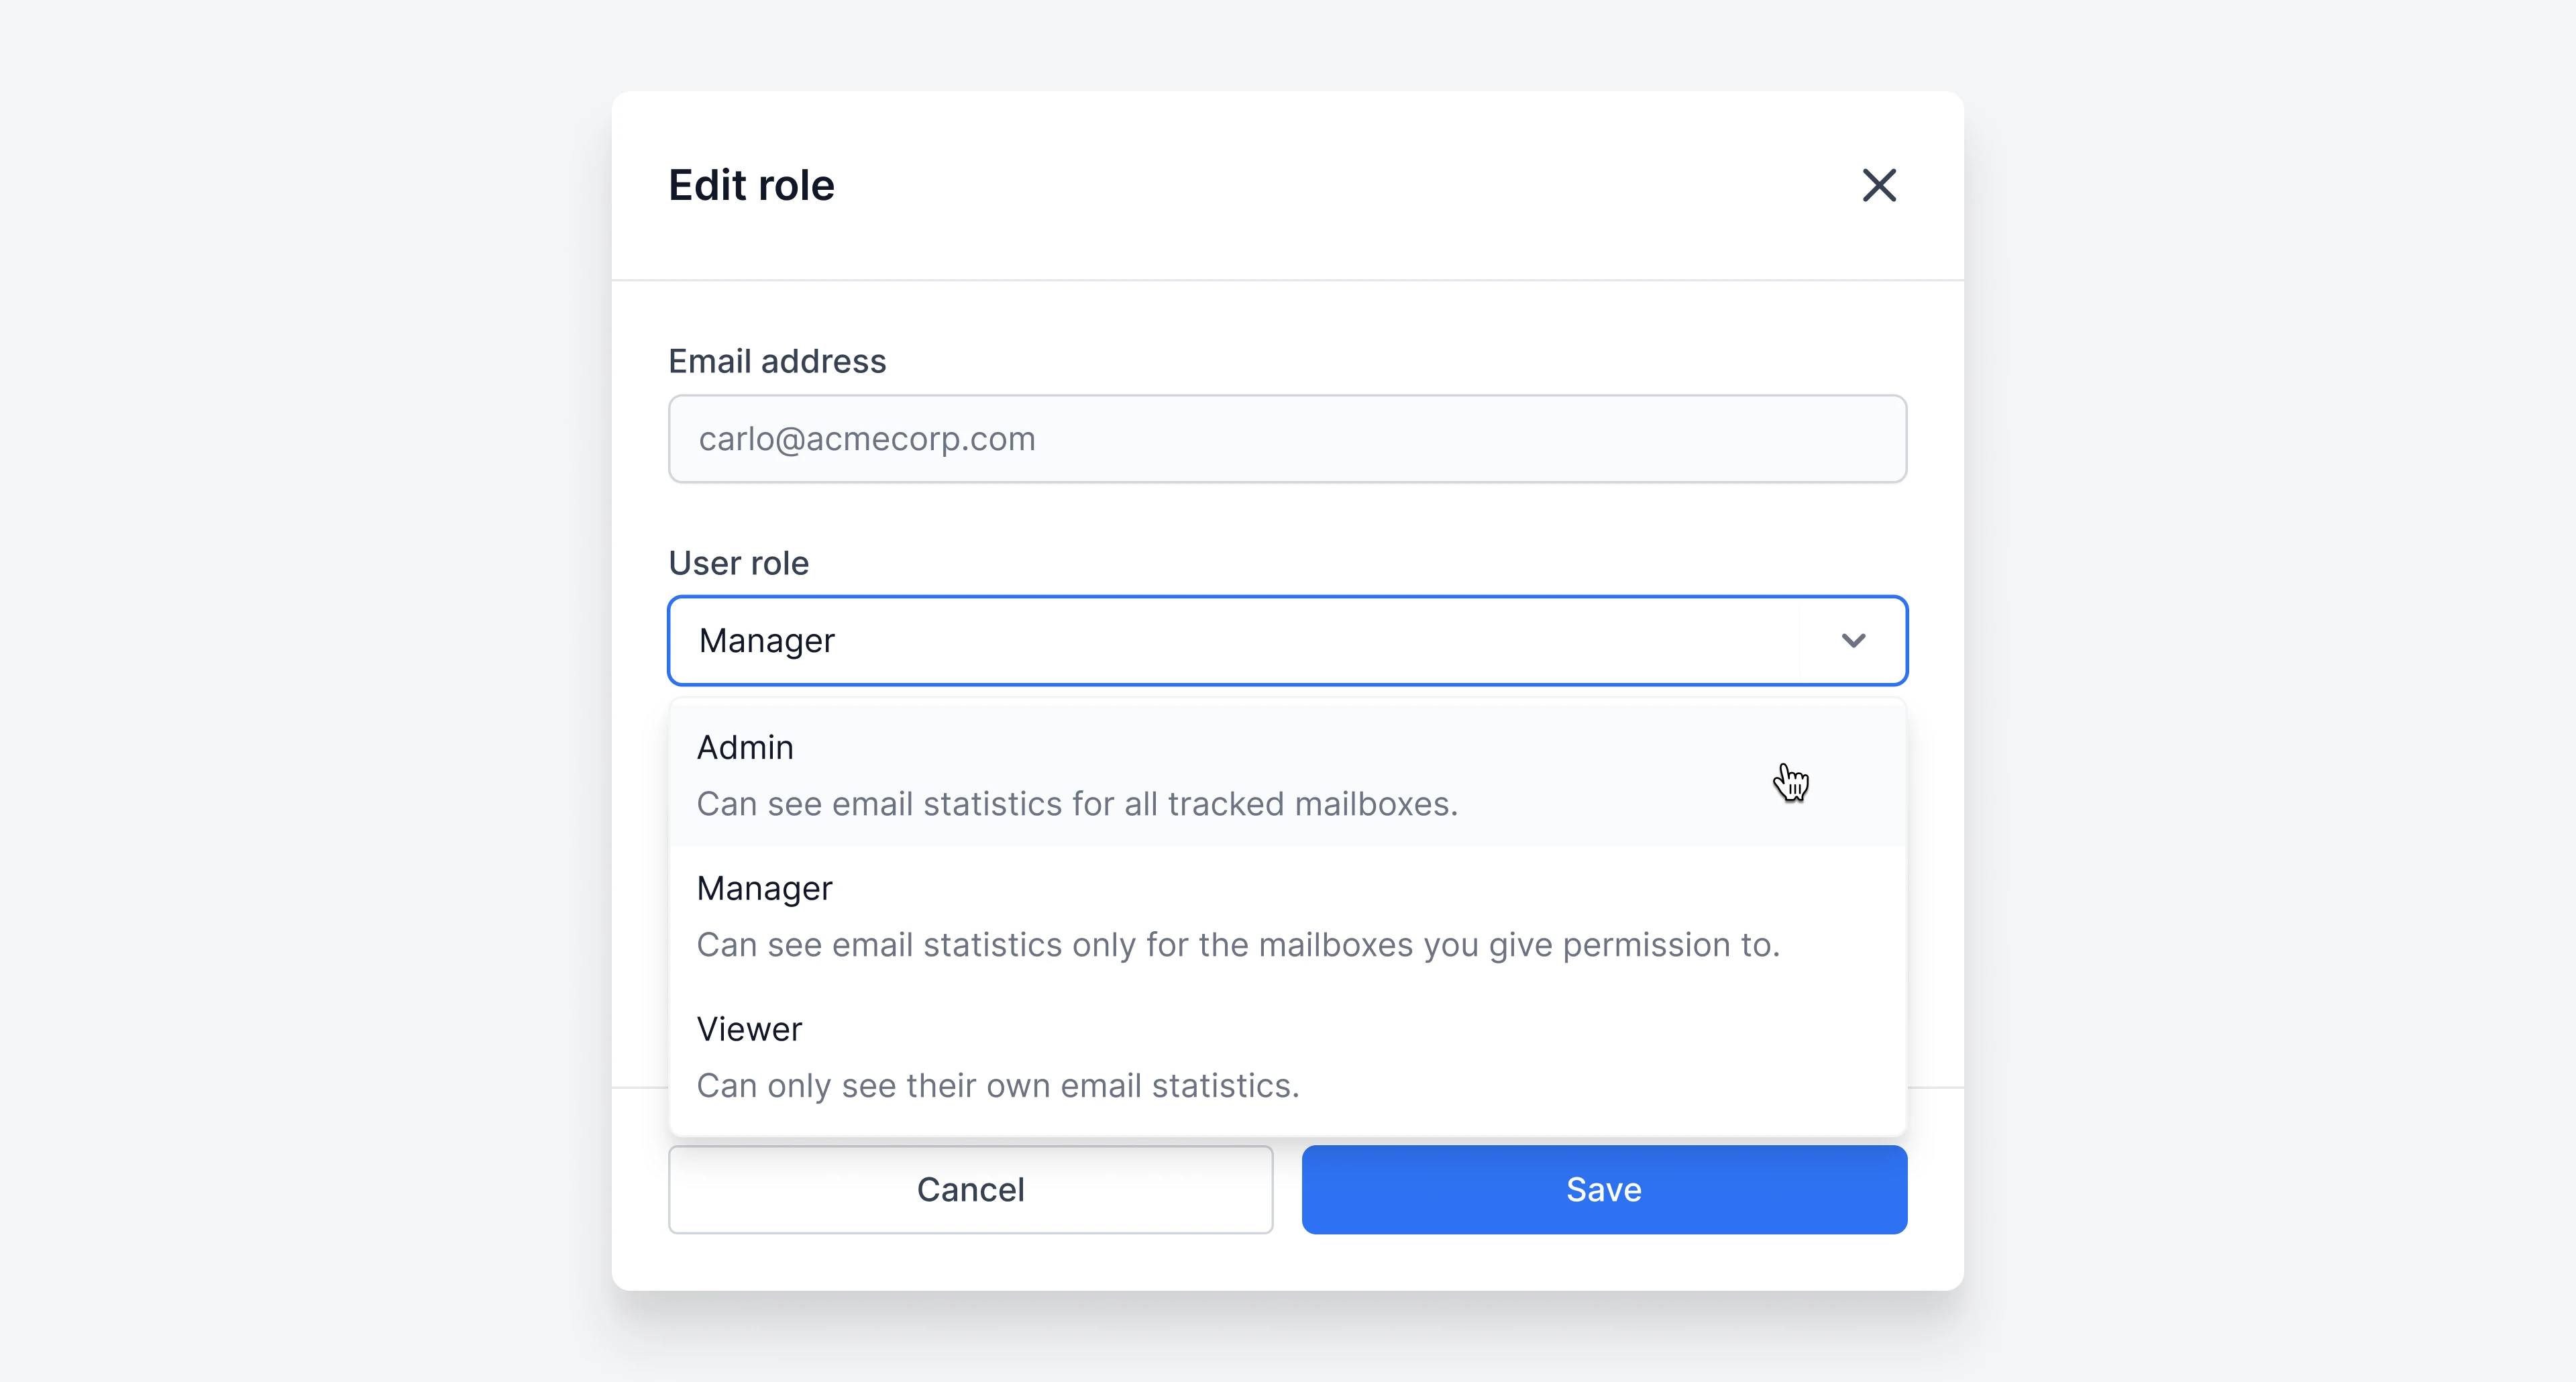
Understanding roles
Email Meter allows you to designate different levels of access to different team members.| Role | Description |
|---|---|
| Admin | The highest level of access in Email Meter. They can manage company settings and view email statistics from all mailboxes. |
| Manager | They can view email statistics from a designated set of Teams and/or individual mailboxes. They don’t have access to company settings, nor the ability to add or remove mailboxes. |
| Viewer | They can view statistics from their own mailbox and nothing else. If you provide someone with this role, their mailbox would need to be being tracked by Email Meter. |
Add users
Go to Settings > Users to add new users. You can add new users by clicking+ Add Users on the page.
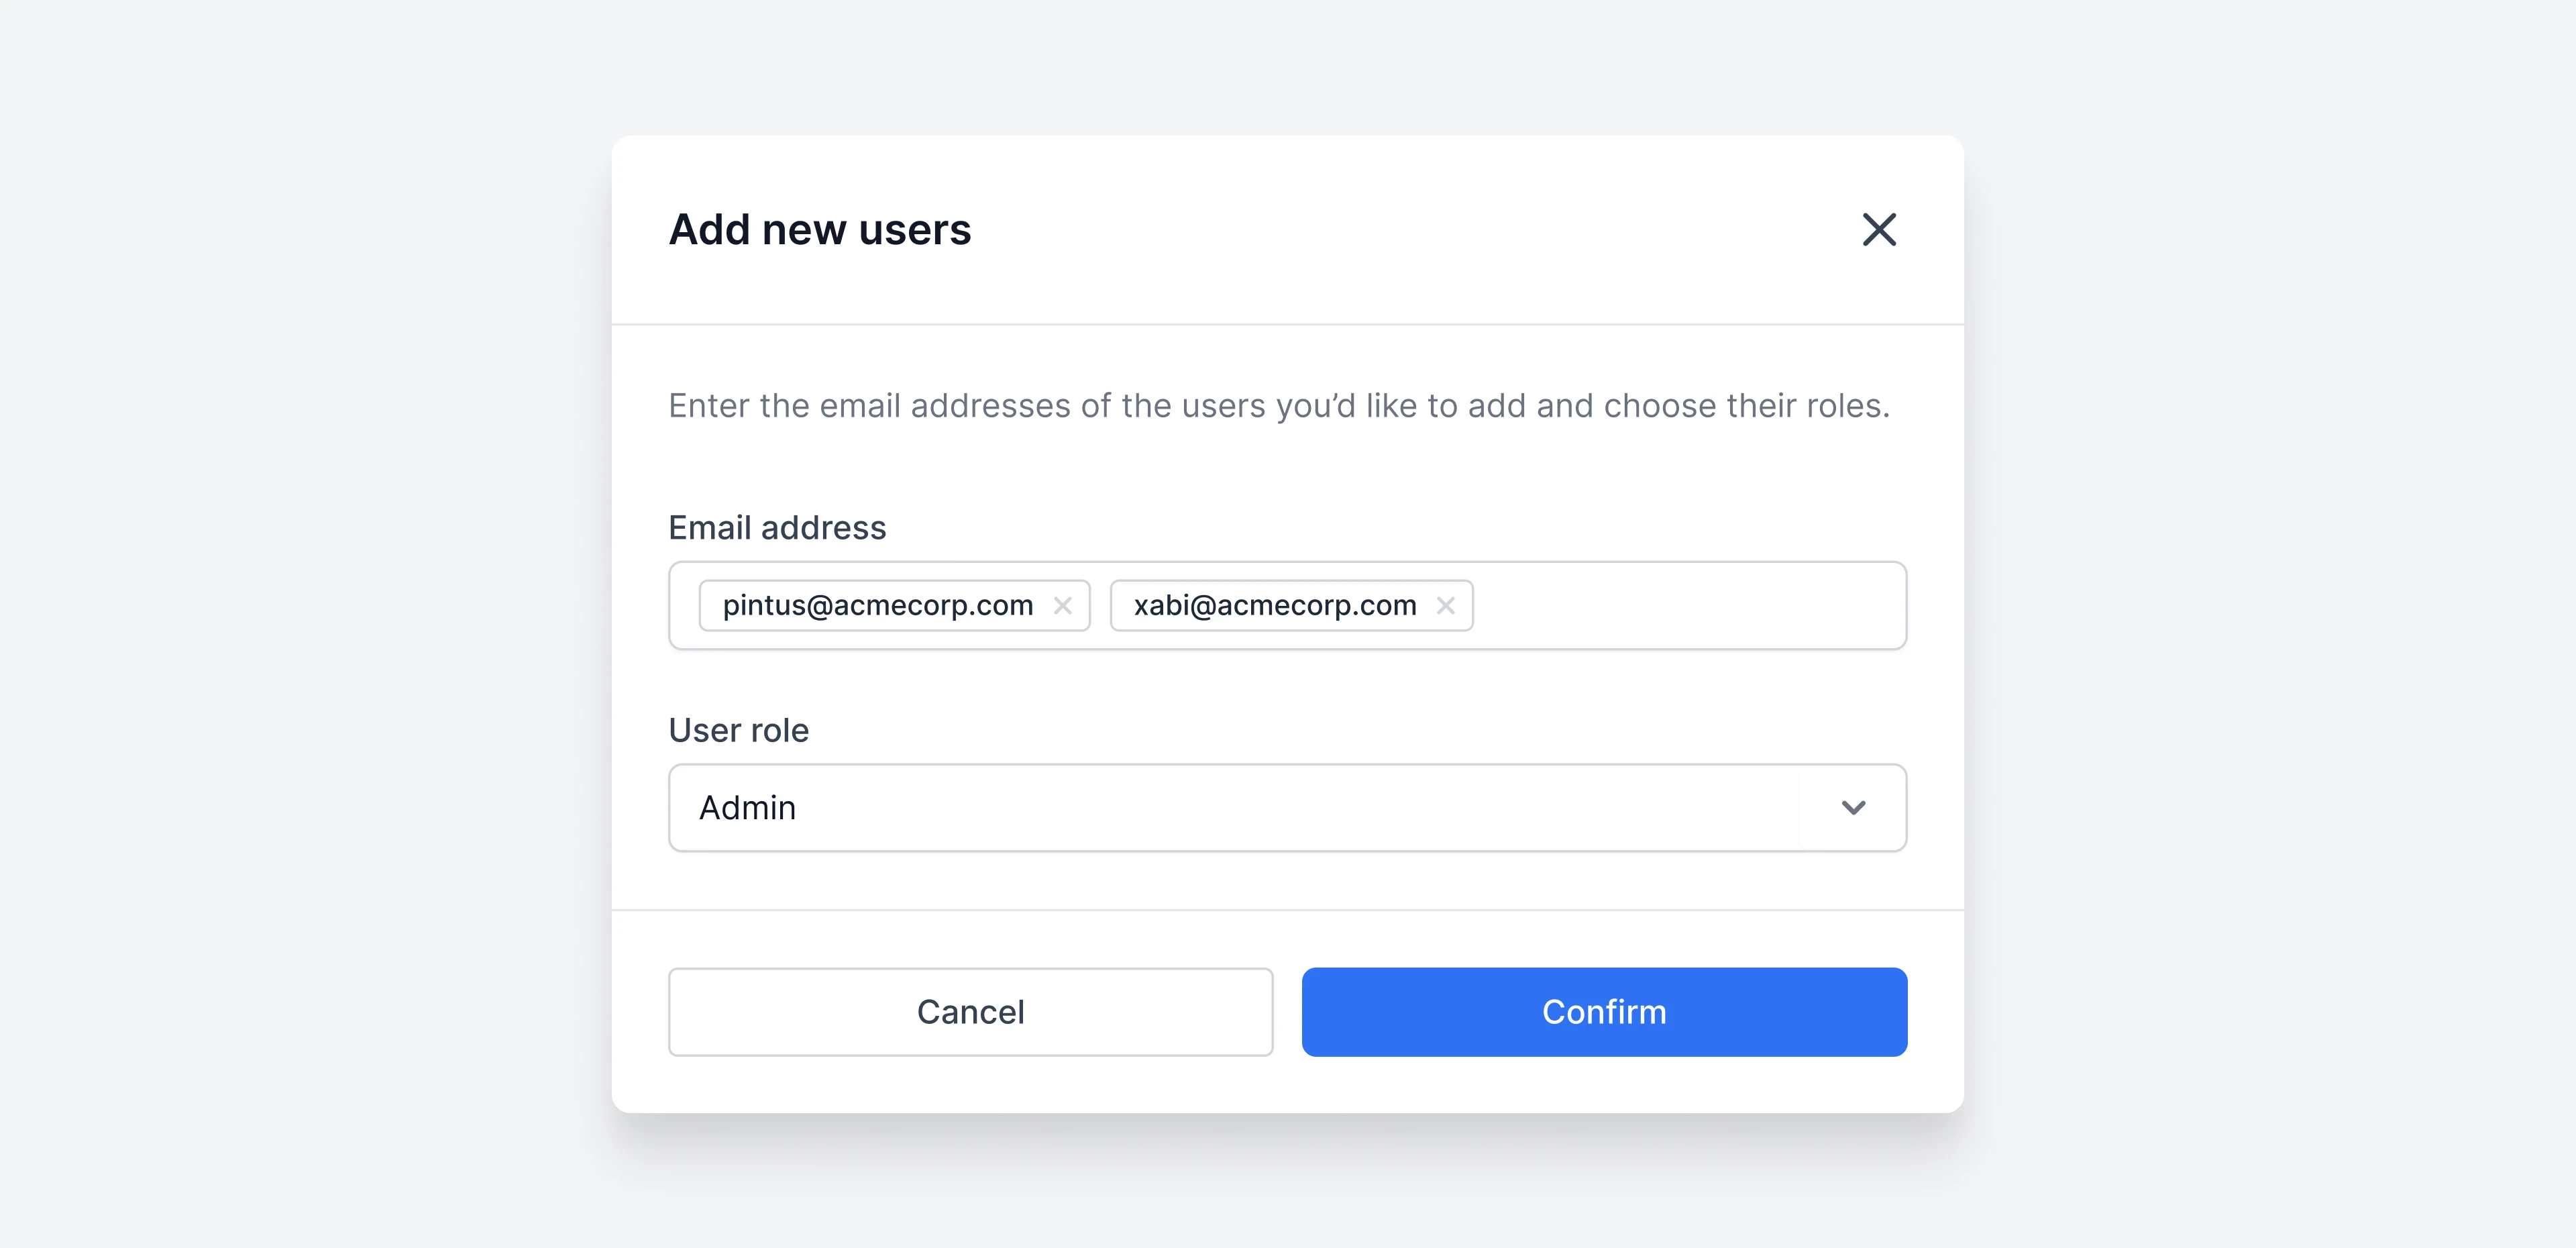 When adding users, you can directly input their email addresses or paste a list. Then, choose the role type you want to assign them and click confirm.
New users won’t receive any email invitation, but will automatically be able to log into Email Meter with their Google or Microsoft login.
When adding users, you can directly input their email addresses or paste a list. Then, choose the role type you want to assign them and click confirm.
New users won’t receive any email invitation, but will automatically be able to log into Email Meter with their Google or Microsoft login.
Remove users
To revoke access to a user, click on the three-dot icon next to their name and chooseRemove user. A modal will open to confirm the action.
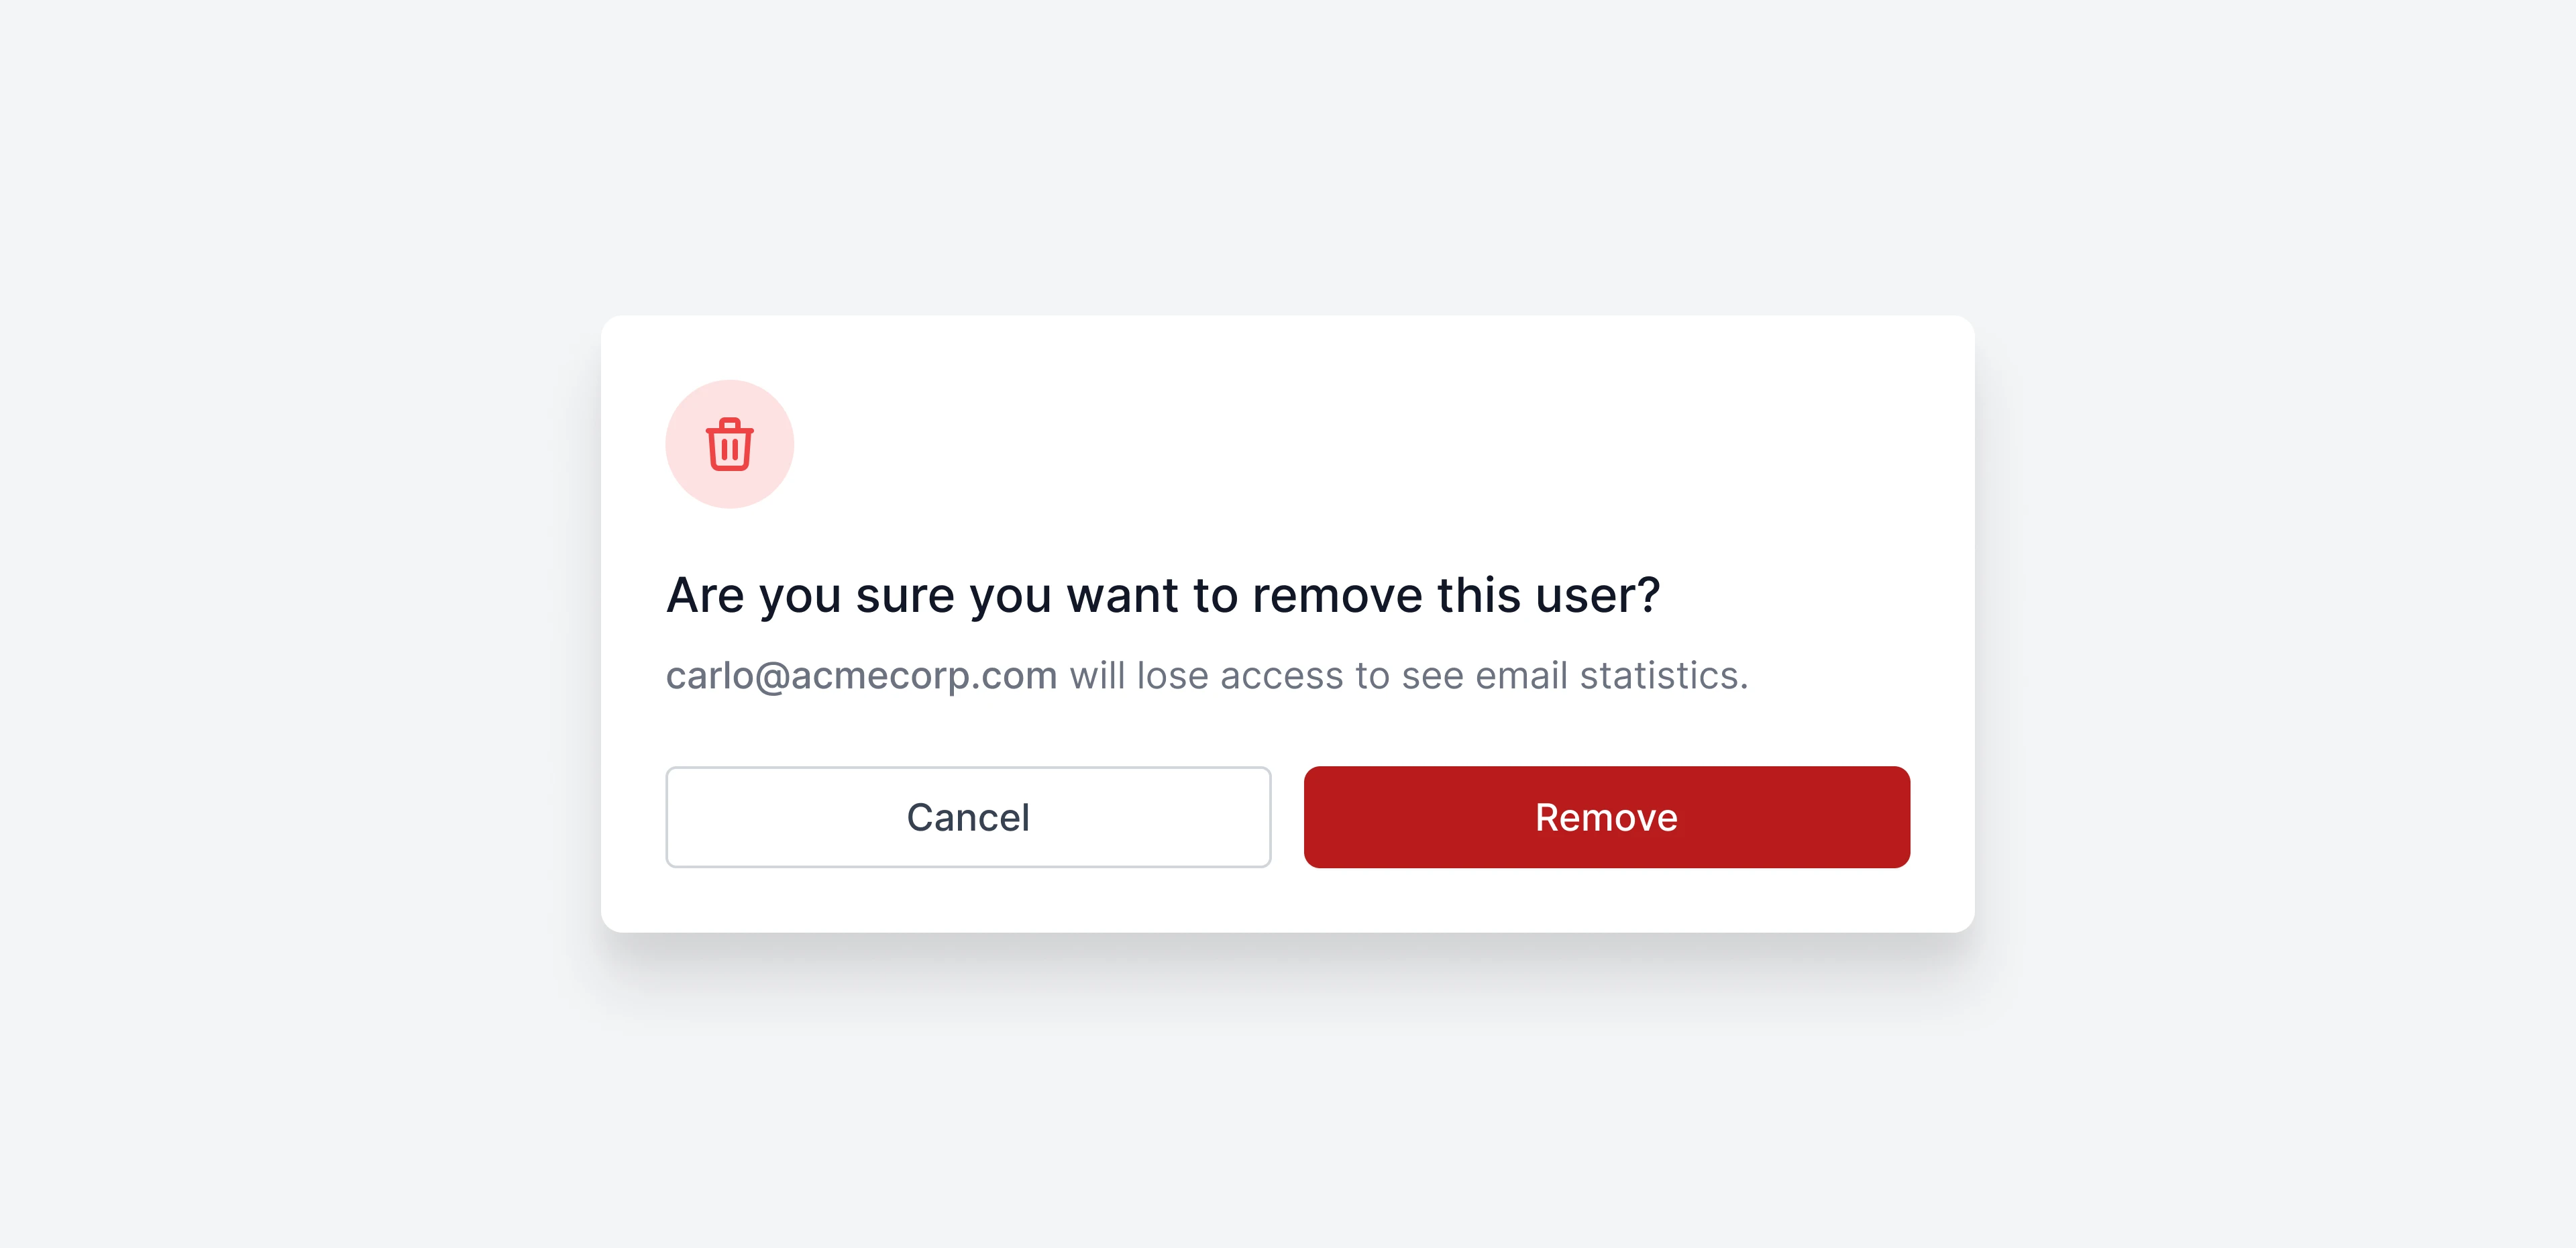 A modal will open to confirm the action. This modal will also give you the option to keep or remove the data related to this mailbox from your email statistics dashboard. Even if you choose to keep their historical data on your dashboard, removed mailboxes are no longer counted as a seat for limit purposes.
Removing users in bulk
You can also use the checkboxes next to the name of each user to select multiple users and remove them in bulk.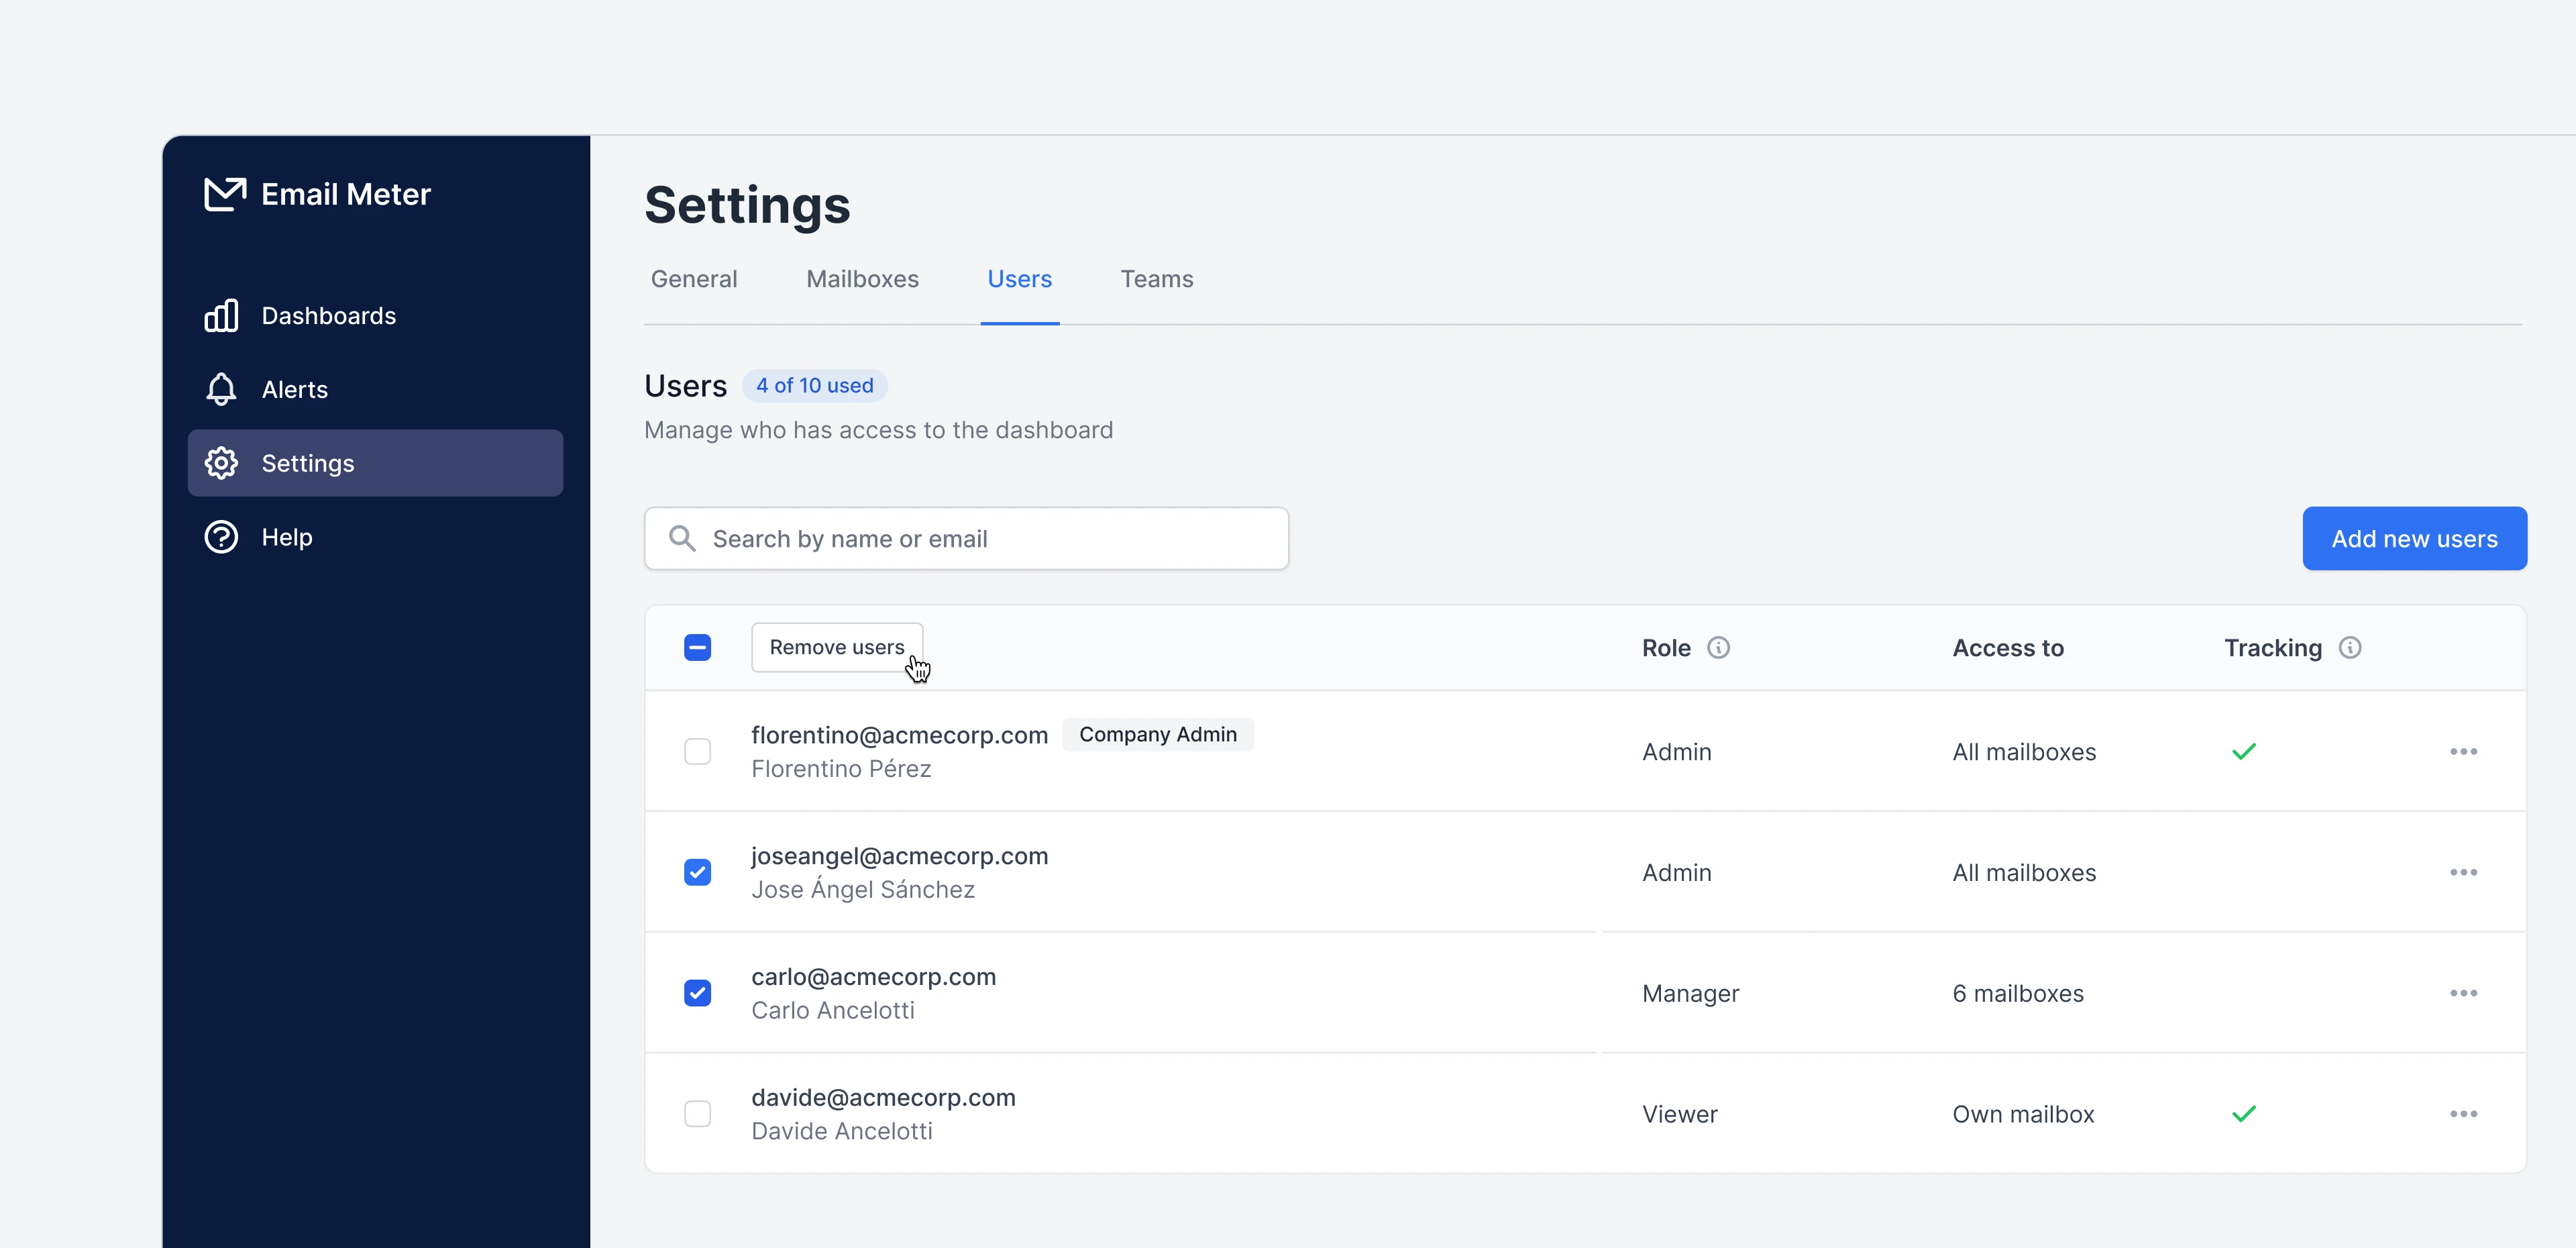
Managing roles
Admins can change the role type of any user by looking up the user in the Settings > Users page, then clicking the three dot menu and selectingEdit role.
Team-based permissions for Managers
You can grant Managers access to entire Teams of mailboxes, making permission management much easier and more scalable — especially for organizations with many users and mailboxes. When editing a Manager’s role, you’ll see two multi-select dropdowns: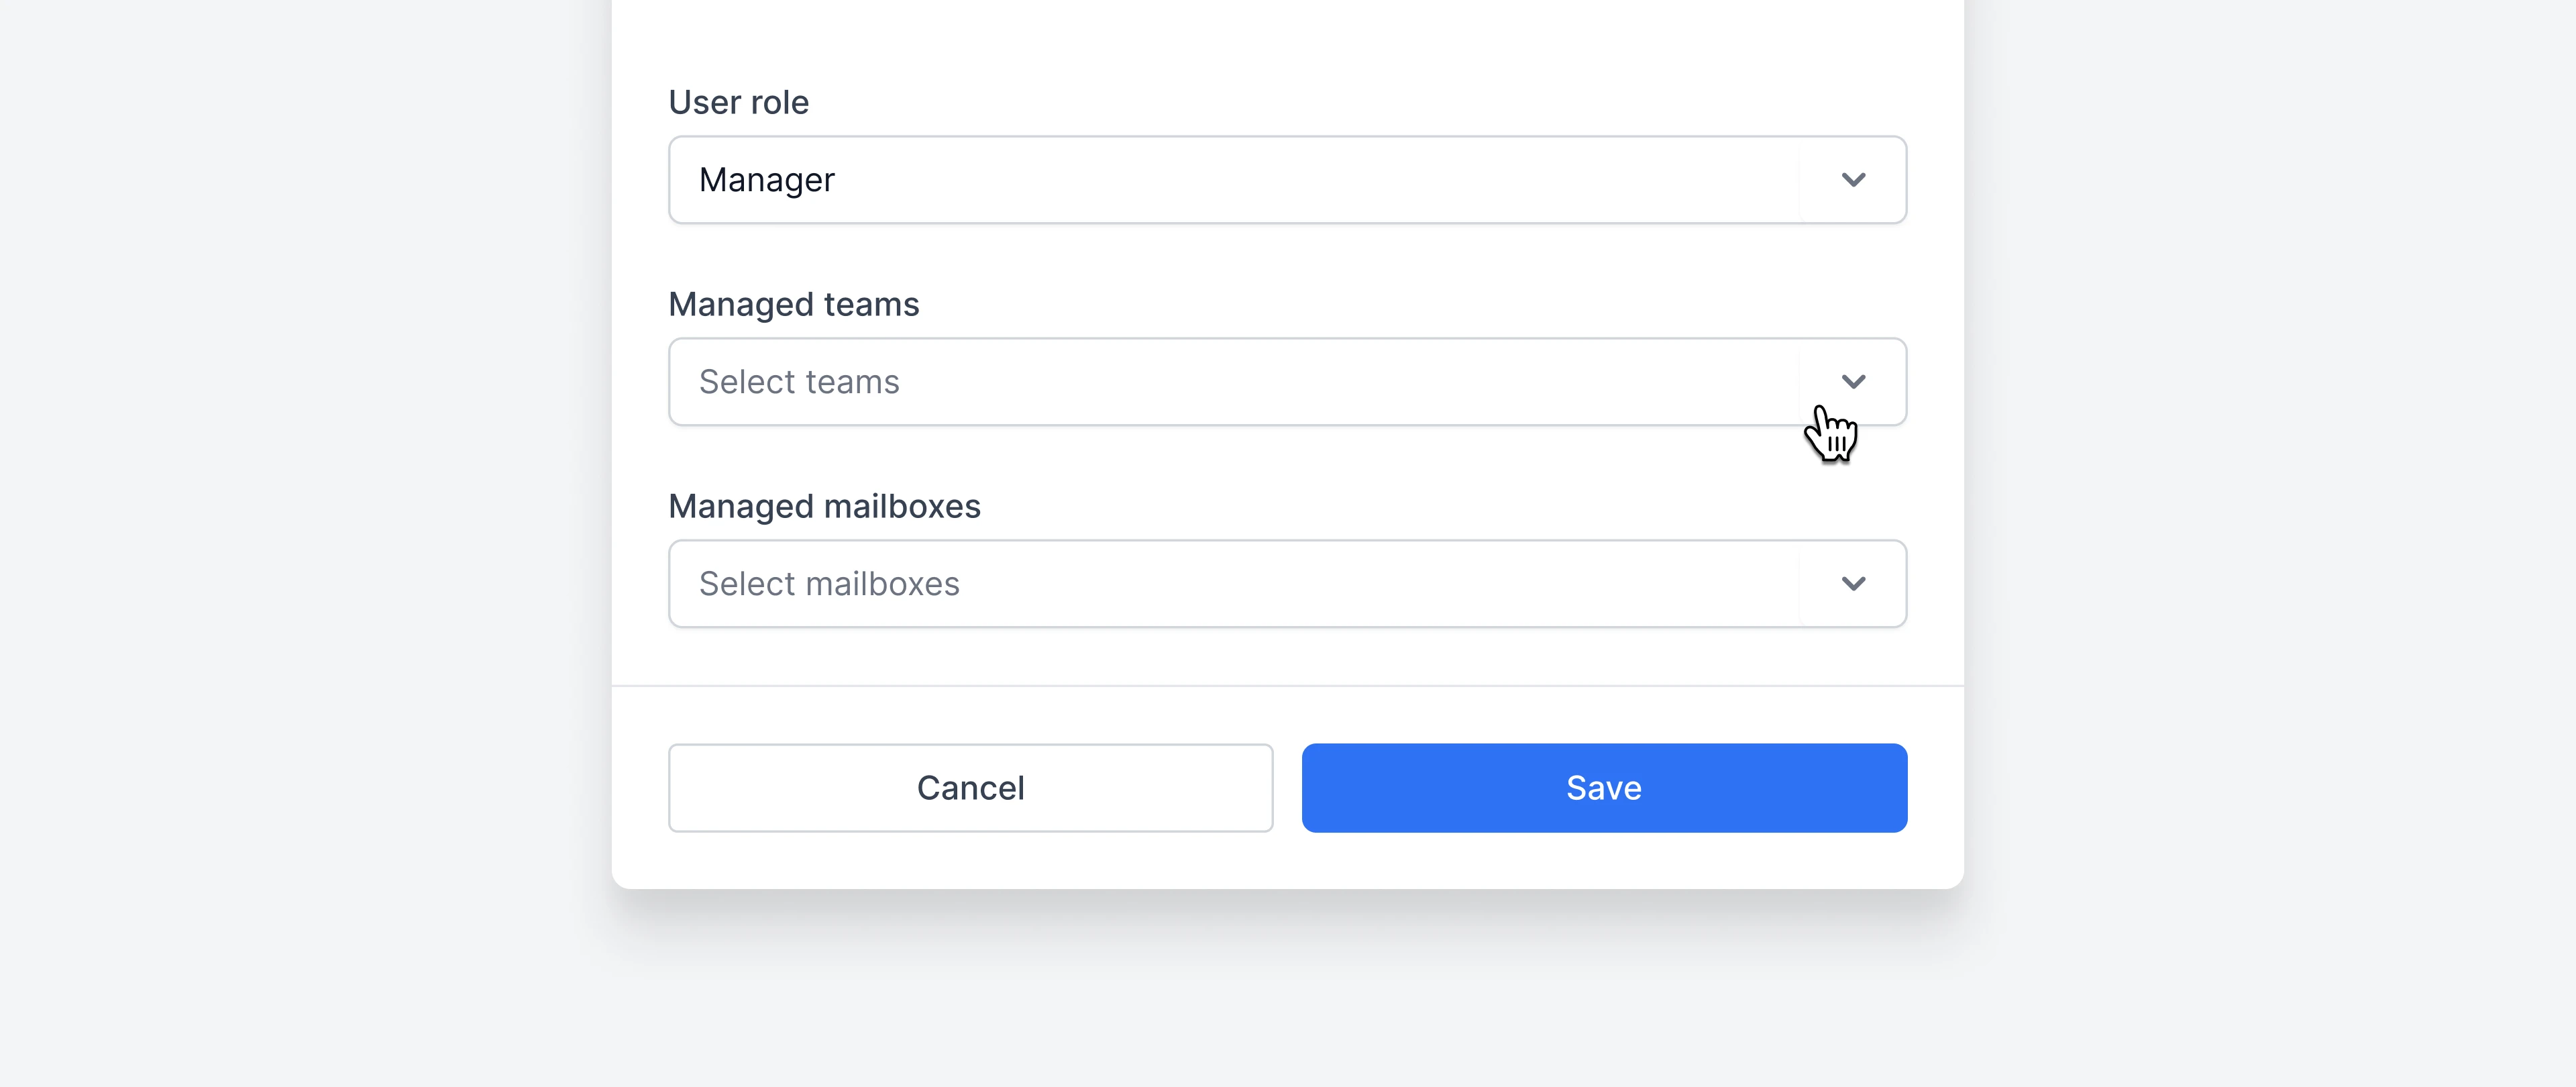
- Managed teams: select one or more Teams to grant the Manager access to all mailboxes within those Teams.
- Managed mailboxes: optionally, select individual mailboxes to grant access to specific mailboxes, either in addition to or instead of Team access.
Permission logic for team-based permissions
- Dynamic updates: when you add or remove mailboxes from a Team, Managers with access to that Team will automatically gain or lose access to those mailboxes.
- Mailbox-level permissions take priority: if a Manager is granted access to a mailbox both through a Team and individually, the individual permission remains even if the mailbox is removed from the Team.
- Deleting a Team: if a Team is deleted, any Manager access granted through that Team will be automatically revoked.
Frequently asked questions
Invite emails aren't being received
Invite emails aren't being received
Google Groups and Microsoft Groups are not treated as individual mailboxes and cannot be tracked via API by Email Meter. However, if you’re tracking the end-mailboxes where emails sent to those Groups are being delivered, they will show up in your dashboard. This means we can create custom reports to analyze workflow related to Google and Microsoft Groups. Just get in touch with your Business Intelligence Consultant if you’re interested.
Is it possible to grant a user access to manage settings without viewing stats?
Is it possible to grant a user access to manage settings without viewing stats?
No, just the shared/delegated mailbox itself. Every email sent from the shared/delegated mailbox comes with a field in the email metadata that tells us which agent sent it, even if that agent’s mailbox isn’t tracked by Email Meter. However, the proper settings need to be activated on your domain. You can read more about it here.
How long does it take for data to appear on my dashboard after I add a mailbox?
How long does it take for data to appear on my dashboard after I add a mailbox?
As of now, the admin role, which enables control over company settings, also grants access to view all data. However, we are working on a new granular Company Manager role that will allow any user to manage settings, irrespective of their data access level.
Can I add users from a different domain?
Can I add users from a different domain?
Yes, you can invite any user to Email Meter to view email statistics, regardless of whether they belong to your main domain or not.