> ## Documentation Index
> Fetch the complete documentation index at: https://docs.enterprise.emailmeter.com/llms.txt
> Use this file to discover all available pages before exploring further.
# Import mailboxes from CSV
> Add or replace tracked mailboxes in bulk using a CSV file
 If you need to add a large number of mailboxes at once, you can upload a CSV file instead of entering them one by one. This is also useful if you want to sync your tracked mailbox list with an export from Google Workspace or Microsoft 365.
## CSV format
Your CSV file should contain a list of email addresses. Email Meter is flexible about the format:
* **Simple list**: one email address per line, no header needed
* **Single column with header**: the header row is automatically detected and skipped
* **Multi-column files**: if your file has multiple columns (like a Google Workspace or Microsoft 365 export), Email Meter will find the column that contains email addresses
Supported delimiters are comma, semicolon, and tab. The file is parsed locally in your browser, so nothing is uploaded to a server until you confirm.
Only `.csv` files are accepted, with a maximum file size of 5 MB.
## Step-by-step walkthrough
Go to [Settings > Mailboxes](https://enterprise.emailmeter.com/settings/mailboxes) and click `+ Add Mailboxes`. In the Add mailboxes screen, select the `Import via CSV` tab.
Drag and drop your file or click to browse. Once uploaded, you'll see a summary of how many email addresses were found and how many rows were invalid (if any).
If you need to add a large number of mailboxes at once, you can upload a CSV file instead of entering them one by one. This is also useful if you want to sync your tracked mailbox list with an export from Google Workspace or Microsoft 365.
## CSV format
Your CSV file should contain a list of email addresses. Email Meter is flexible about the format:
* **Simple list**: one email address per line, no header needed
* **Single column with header**: the header row is automatically detected and skipped
* **Multi-column files**: if your file has multiple columns (like a Google Workspace or Microsoft 365 export), Email Meter will find the column that contains email addresses
Supported delimiters are comma, semicolon, and tab. The file is parsed locally in your browser, so nothing is uploaded to a server until you confirm.
Only `.csv` files are accepted, with a maximum file size of 5 MB.
## Step-by-step walkthrough
Go to [Settings > Mailboxes](https://enterprise.emailmeter.com/settings/mailboxes) and click `+ Add Mailboxes`. In the Add mailboxes screen, select the `Import via CSV` tab.
Drag and drop your file or click to browse. Once uploaded, you'll see a summary of how many email addresses were found and how many rows were invalid (if any).
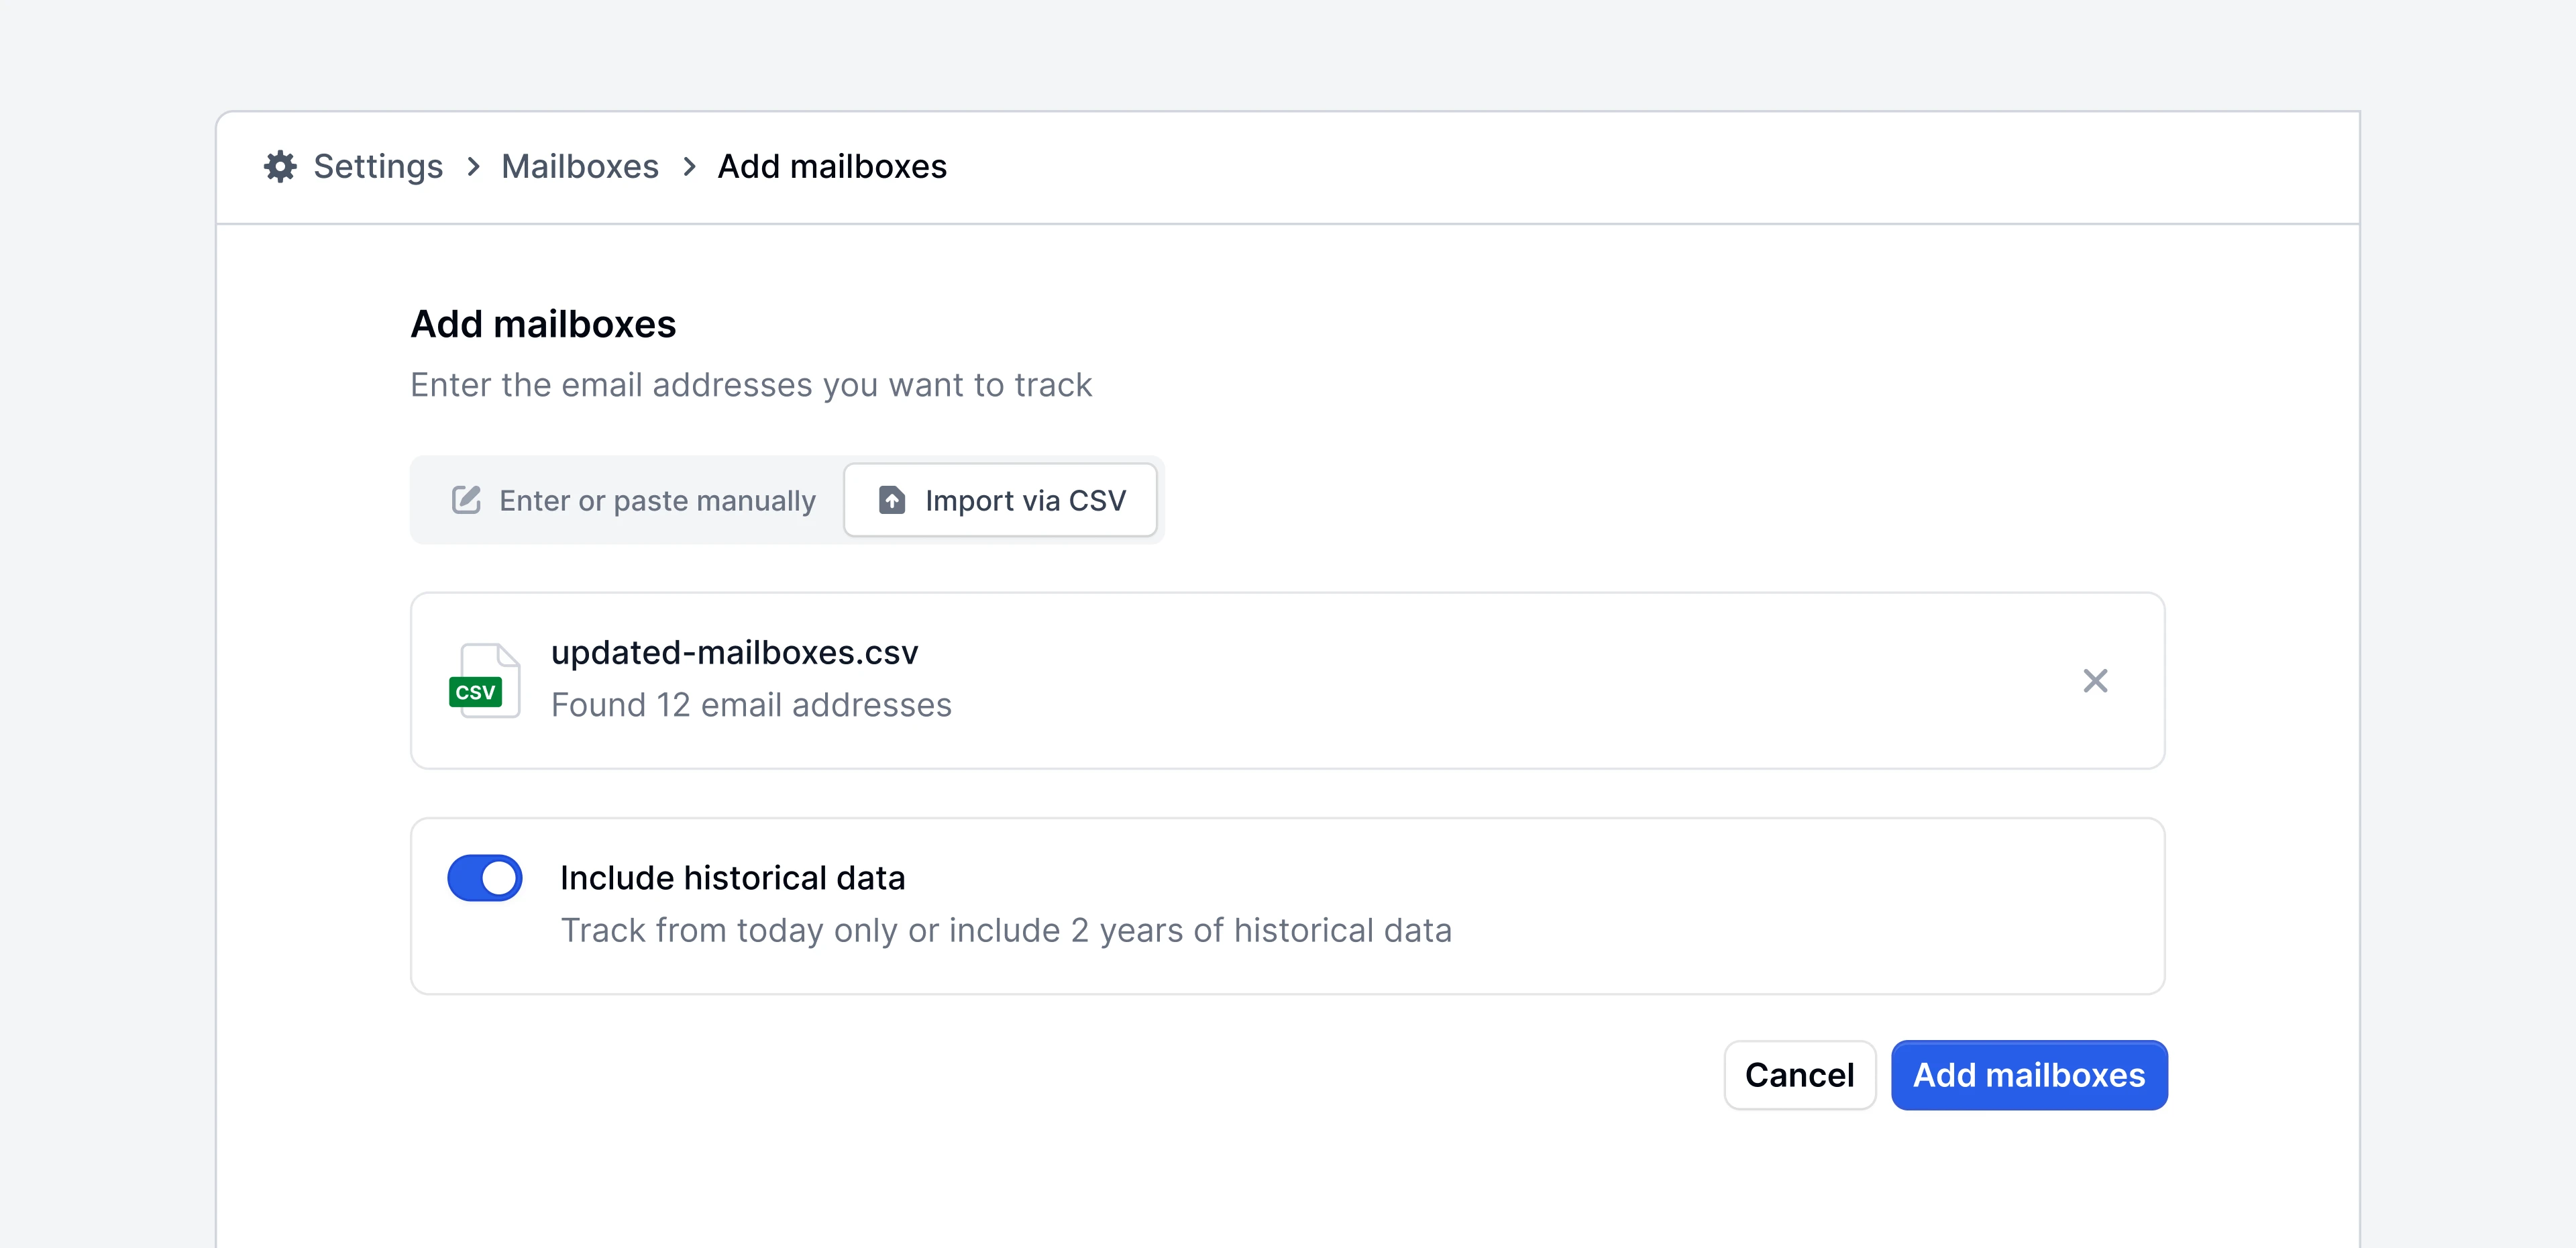 Use the toggle to choose whether you want to load historical data for the new mailboxes. If enabled, up to two years of past data will be loaded. If not, only emails sent and received after adding the mailbox will be tracked.
You'll be asked to choose between two modes:
* **Add only**: appends the new mailboxes from your CSV to your existing list. Mailboxes that are already tracked are simply skipped.
* **Replace**: syncs your tracked mailbox list to match the CSV. New mailboxes are added, and any currently tracked mailboxes that are not in the CSV are removed. Historical data for removed mailboxes is retained by default.
Use the toggle to choose whether you want to load historical data for the new mailboxes. If enabled, up to two years of past data will be loaded. If not, only emails sent and received after adding the mailbox will be tracked.
You'll be asked to choose between two modes:
* **Add only**: appends the new mailboxes from your CSV to your existing list. Mailboxes that are already tracked are simply skipped.
* **Replace**: syncs your tracked mailbox list to match the CSV. New mailboxes are added, and any currently tracked mailboxes that are not in the CSV are removed. Historical data for removed mailboxes is retained by default.
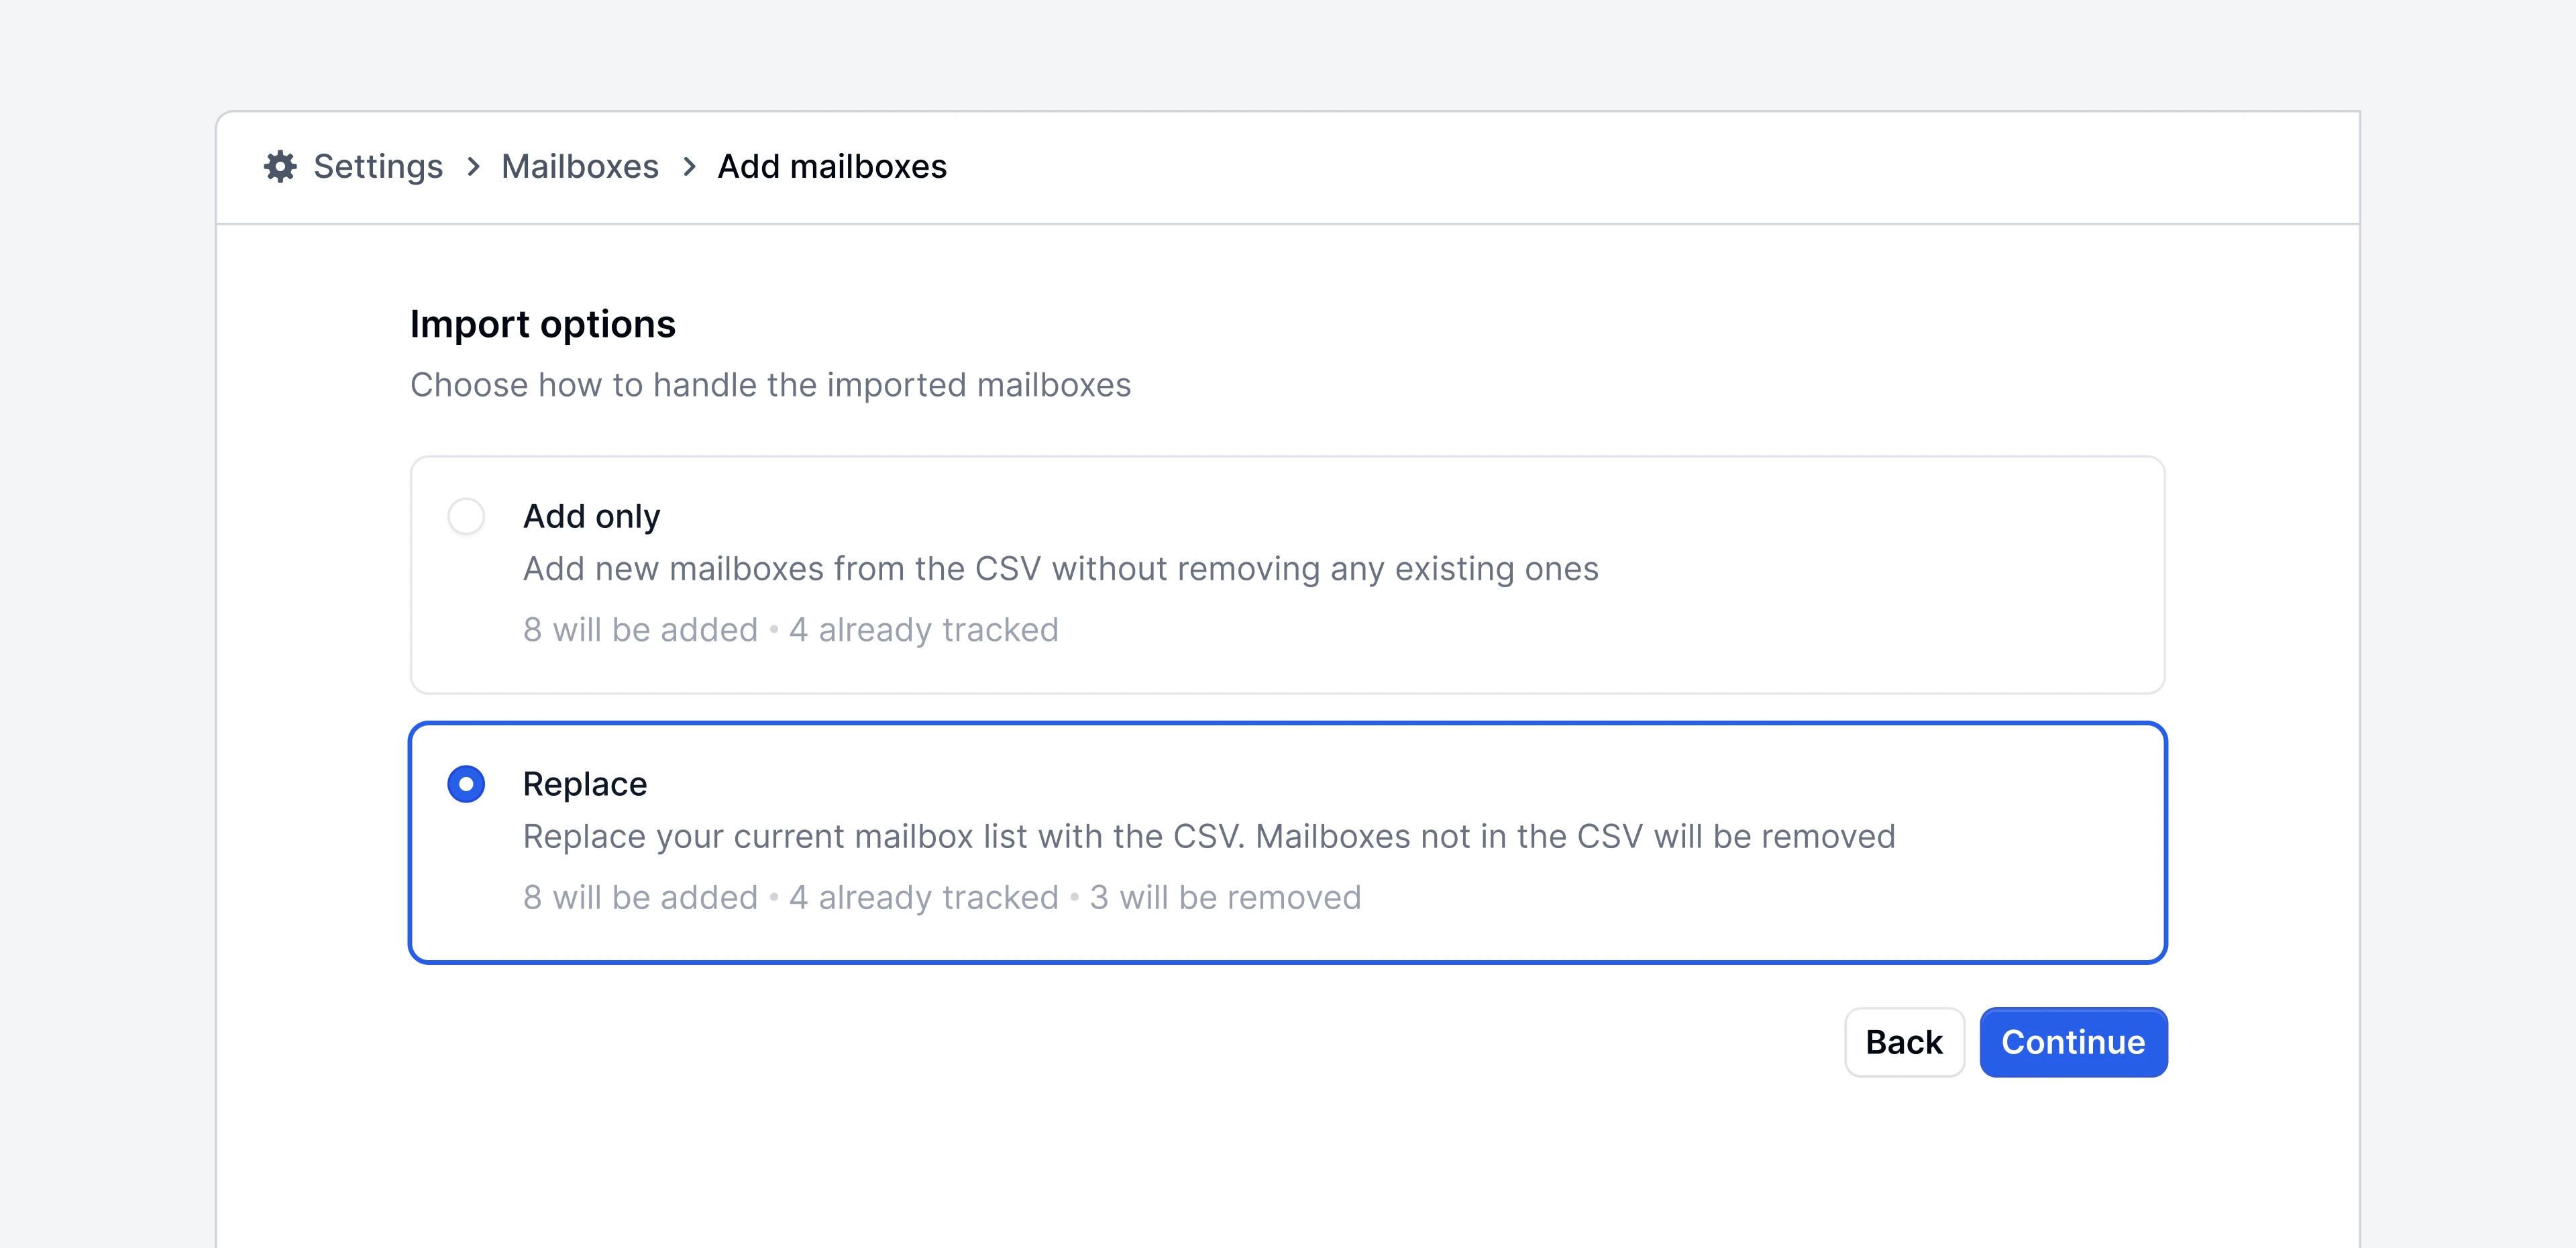 Replace mode will remove any tracked mailboxes that are not in your CSV file. Make sure your CSV contains the full list of mailboxes you want to track.
Email Meter checks API access for each new mailbox to make sure it can be tracked. This runs automatically and you'll see a progress indicator while it completes.
Once validation finishes, you'll see the results grouped into categories:
* **Ready to add**: mailboxes that passed validation and will be added
* **Already tracked**: mailboxes that are already in your list (skipped)
* **Needs attention**: mailboxes that couldn't be validated, usually because Email Meter doesn't have API access to them
* **To remove**: mailboxes that will be removed because they're not in your CSV (replace mode only)
Replace mode will remove any tracked mailboxes that are not in your CSV file. Make sure your CSV contains the full list of mailboxes you want to track.
Email Meter checks API access for each new mailbox to make sure it can be tracked. This runs automatically and you'll see a progress indicator while it completes.
Once validation finishes, you'll see the results grouped into categories:
* **Ready to add**: mailboxes that passed validation and will be added
* **Already tracked**: mailboxes that are already in your list (skipped)
* **Needs attention**: mailboxes that couldn't be validated, usually because Email Meter doesn't have API access to them
* **To remove**: mailboxes that will be removed because they're not in your CSV (replace mode only)
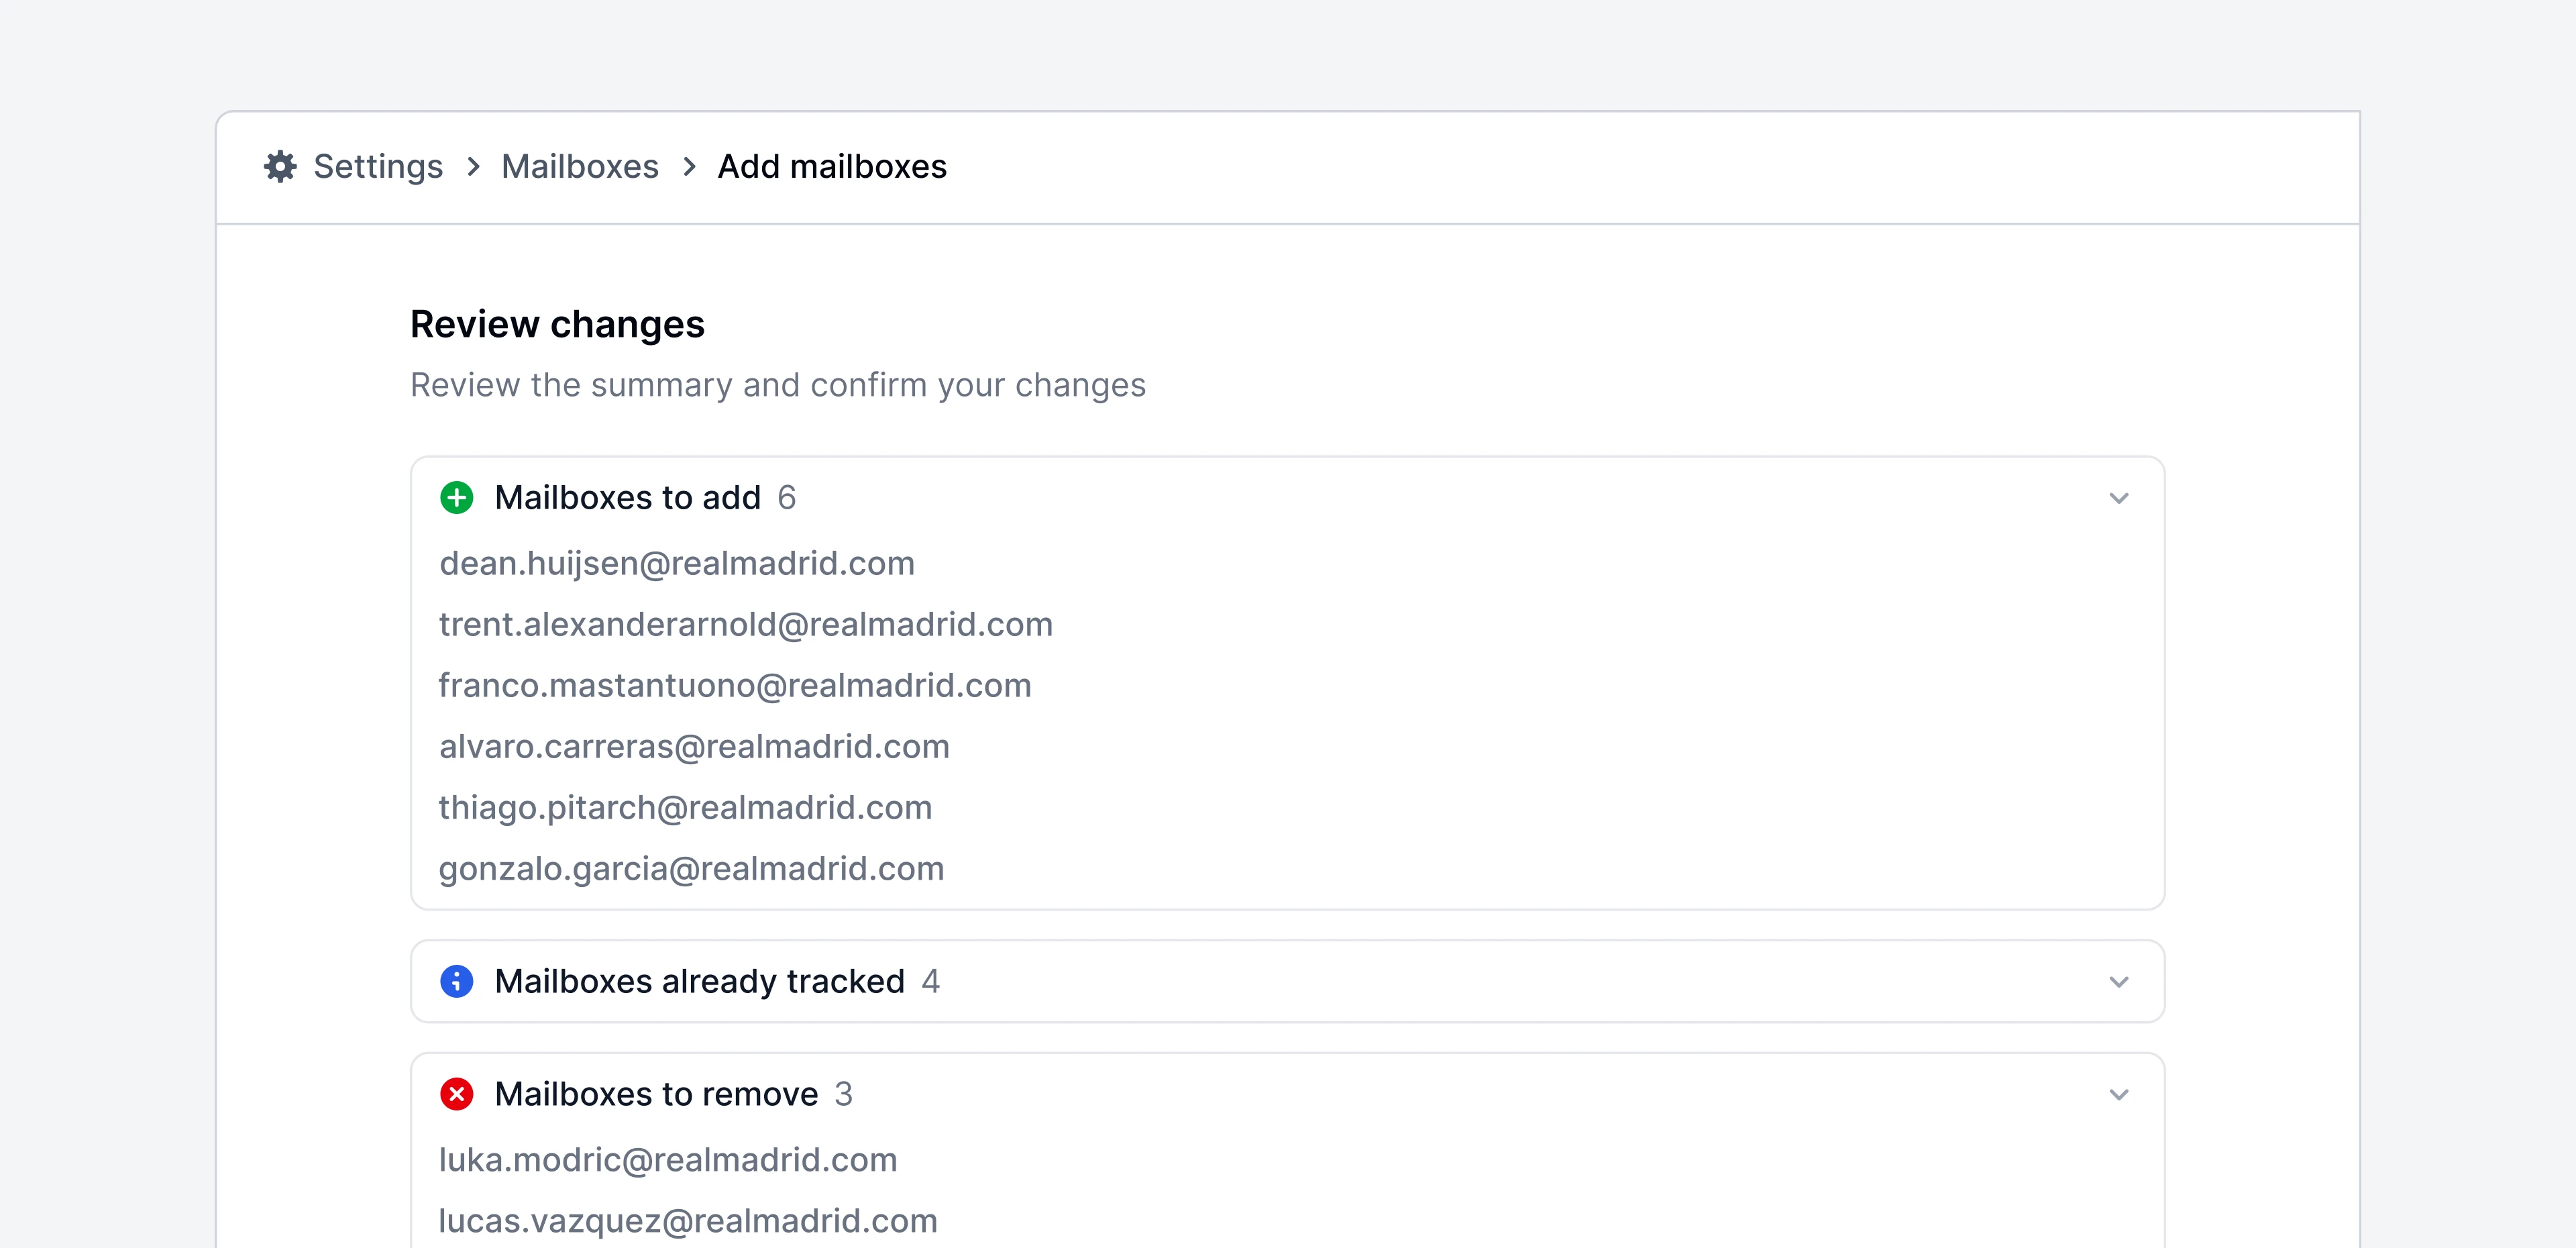 Review the results and click confirm to apply the changes.
## Error handling
During validation, some mailboxes may not pass. Common reasons include:
* **No API access**: Email Meter hasn't been granted access to that mailbox. This usually needs to be resolved by your Google or Microsoft domain administrator.
* **Domain not allowed**: the email address belongs to a domain that isn't part of your Email Meter workspace.
* **Invalid email format**: the row in the CSV didn't contain a valid email address. These rows are skipped during parsing.
If the import would exceed your plan's mailbox limit, you'll see a warning with the number of remaining slots available. In replace mode, removals are accounted for when calculating available slots.
You can copy the list of mailboxes that need attention and share it with your IT team to resolve access issues.
## Frequently asked questions
No. When mailboxes are removed through replace mode, their historical data is retained by default. The mailboxes simply stop collecting new data. They also stop counting towards your plan's mailbox limit.
Yes. Email Meter auto-detects common header names like `email`, `email address`, `mailbox`, and `user`, and it handles multi-column files by finding the column with valid email addresses. You can usually upload these exports without any modifications.
Duplicates are automatically removed during parsing. Each email address is only processed once.
Data for newly added mailboxes will appear on your dashboard the next day at 12:01 AM local time. If you enabled historical data, the full two-year backfill may take longer depending on the volume of emails.
Review the results and click confirm to apply the changes.
## Error handling
During validation, some mailboxes may not pass. Common reasons include:
* **No API access**: Email Meter hasn't been granted access to that mailbox. This usually needs to be resolved by your Google or Microsoft domain administrator.
* **Domain not allowed**: the email address belongs to a domain that isn't part of your Email Meter workspace.
* **Invalid email format**: the row in the CSV didn't contain a valid email address. These rows are skipped during parsing.
If the import would exceed your plan's mailbox limit, you'll see a warning with the number of remaining slots available. In replace mode, removals are accounted for when calculating available slots.
You can copy the list of mailboxes that need attention and share it with your IT team to resolve access issues.
## Frequently asked questions
No. When mailboxes are removed through replace mode, their historical data is retained by default. The mailboxes simply stop collecting new data. They also stop counting towards your plan's mailbox limit.
Yes. Email Meter auto-detects common header names like `email`, `email address`, `mailbox`, and `user`, and it handles multi-column files by finding the column with valid email addresses. You can usually upload these exports without any modifications.
Duplicates are automatically removed during parsing. Each email address is only processed once.
Data for newly added mailboxes will appear on your dashboard the next day at 12:01 AM local time. If you enabled historical data, the full two-year backfill may take longer depending on the volume of emails.